Today’s new cupcake recipe comes straight from the brilliant and sweet-as-ever owner of DŌ Cookie Dough Confections, Kristen Tomlan. Kristen has become one of my dearest friends over the years– the power of cookies literally connected us! She’s a gracious, hardworking, and business-owning woman from whom I gather so much inspiration. Kristen just released her cookbook debut, surely to hit the best-selling list, and I couldn’t be more excited for her. (Let’s all give a WOOHOO for Kristen!) She is generously allowing me to share her cookbook with all of you and publish one of the best recipes found inside.
Ok, every recipe of hers is the best, but I had to play favorites with this one because she based her molten cookie dough cupcakes off of my vanilla cupcakes recipe. ♥
This is so much more than a cookbook; it’s a huge resource of recipes, a fun gift, and a gorgeous coffee table book (that you’ll READ and USE).
Kristen’s molten cookie dough cupcakes (and all of her cookie dough and dessert recipes) are completely safe to eat because we’re using heat-treated flour and pasteurized egg whites. The unique aspect about her cookie dough is that you can eat it raw and it tastes just like cookie dough because IT IS cookie dough– just without any substituted ingredients. Another unique aspect about Kristen’s dough recipes is that you can bake them, too. Yes, her cookie dough recipes are bake-able for actual baked cookies.
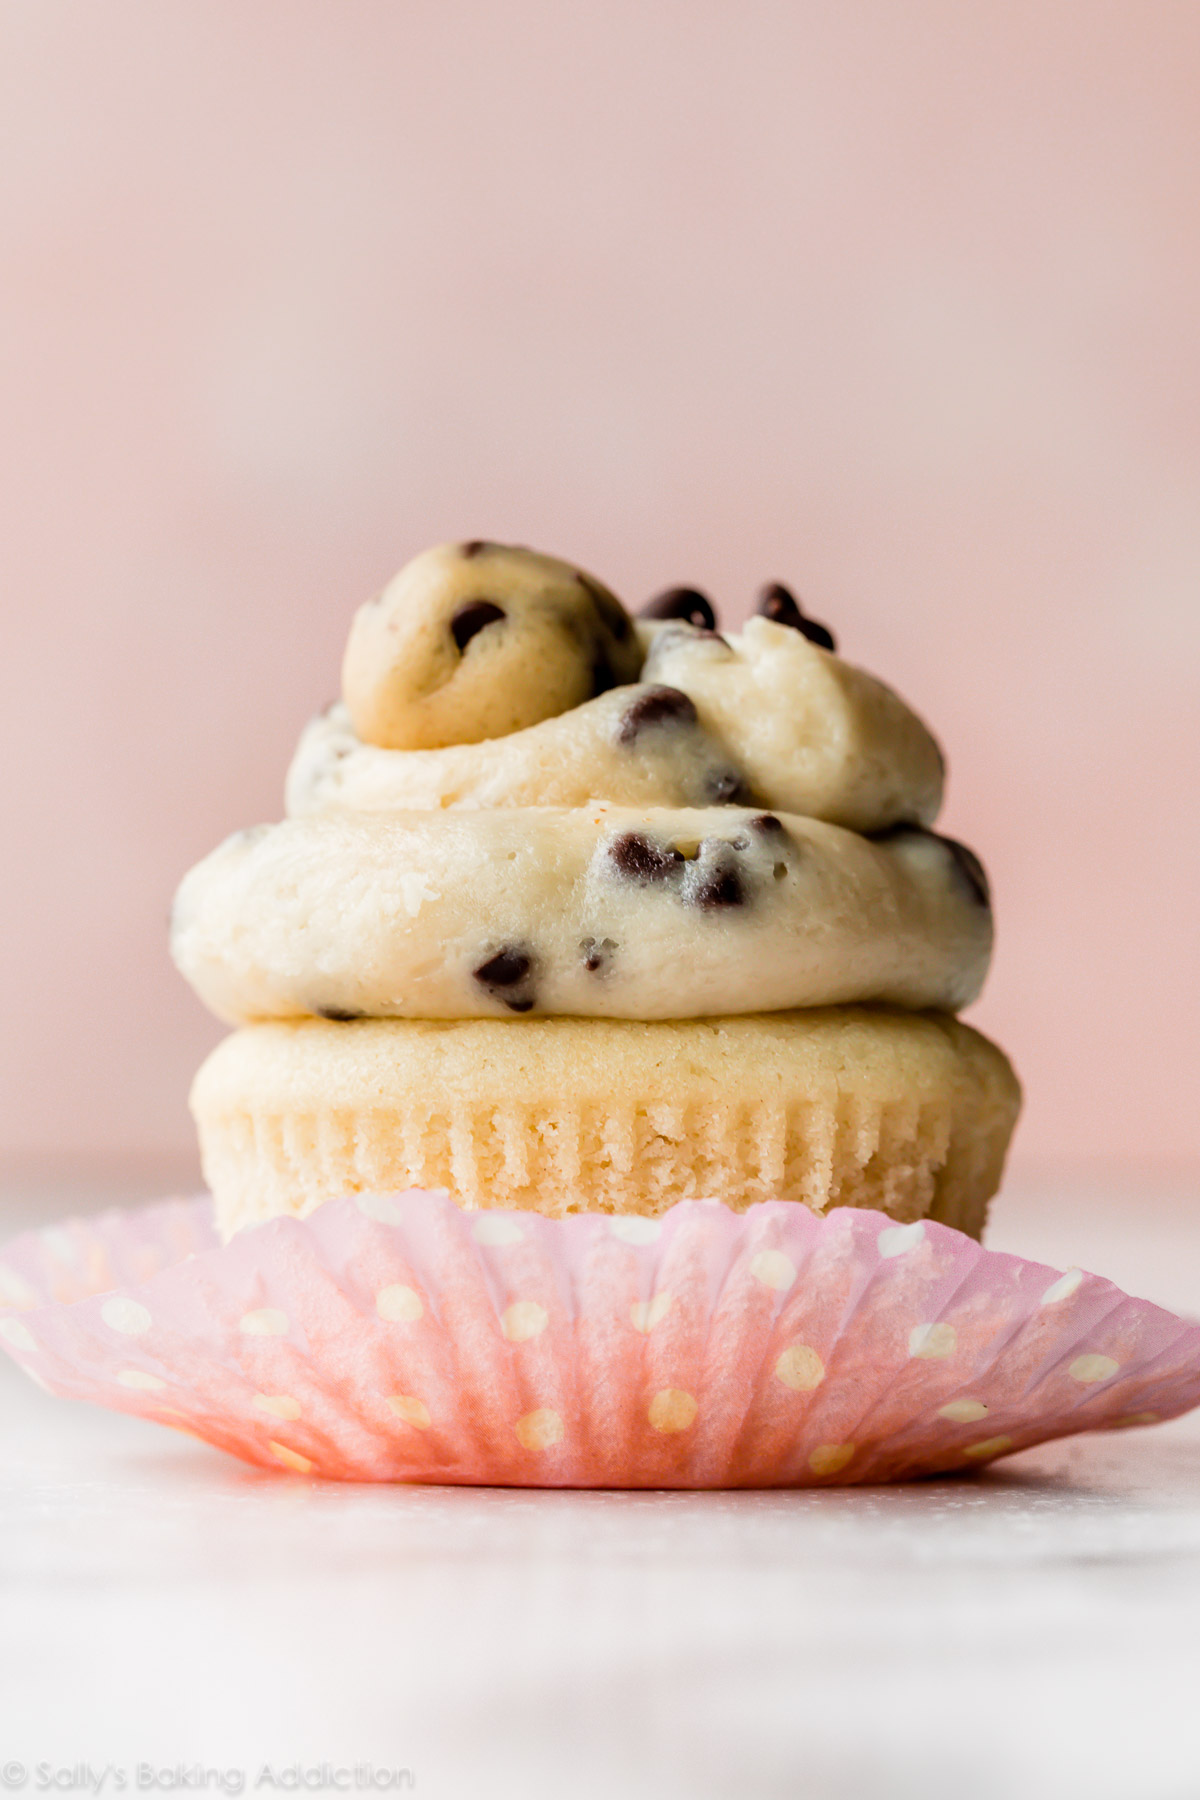
I love that we don’t need to carve out a hole in the cupcake. Instead, literally press the cold cookie dough ball into the warm cupcake. The dough ball won’t sit completely flat, so expect a little lump on top. Don’t worry, you’ll cover it with frosting!
If cookie dough and buttercream joined forces, you’d literally have… heaven? Yes, that sounds right. Here we’re making a creamy vanilla buttercream and mixing in the cookie dough reserved from the cupcake’s filling.
I love that this buttercream is slightly salted, so it’s not overly sweet. By itself, it’s reminiscent of actual cookie dough. Use a spoon to break little chunks of the leftover cookie dough, then beat it into the frosting on low speed. It’s ok if the cookie dough chunks are not fully combined into the buttercream. (Because why wouldn’t you want surprise cookie dough bites in frosting?!)
.tasty-recipes-image {
float: right; }
.tasty-recipes-yield-scale {
border: 1px solid #979599;
border-radius: 2px;
color: #979599;
margin-left: 3px;
padding: 0 4px;
font-size: 0.7rem; }
.tasty-recipes-scale-container {
float: right;
padding: 0 0 1rem; }
.tasty-recipes-scale-container .tasty-recipes-scale-label {
text-transform: uppercase;
font-size: 0.6rem;
color: #979599; }
.tasty-recipes-scale-container button {
background: transparent;
border: 1px solid #979599;
border-radius: 2px;
color: #979599;
margin-left: 5px;
padding: 2px 4px; }
.tasty-recipes-scale-container button.tasty-recipes-scale-button-active {
color: #353547;
border-color: #353547; }
.tasty-recipes-scale-container button:focus {
outline: none; }
.tasty-recipes-print-button {
background-color: #666677;
display: inline-block;
padding-left: 1em;
padding-right: 1em;
padding-top: 0.5em;
padding-bottom: 0.5em;
text-decoration: none; }
a.tasty-recipes-print-button {
color: #fff; }
a.tasty-recipes-print-button:hover {
color: #fff; }
.tasty-recipes-equipment {
display: -webkit-box;
display: flex;
flex-wrap: wrap;
-webkit-box-pack: space-evenly;
justify-content: space-evenly; }
.tasty-recipes-equipment > h3 {
-webkit-box-flex: 0;
flex: 0 0 100%; }
.tasty-recipes-equipment .tasty-link-card {
-webkit-box-flex: 0;
flex: 0 0 50%;
padding: 1.5rem 1rem;
text-align: center; }
@media screen and (min-width: 500px) {
.tasty-recipes-equipment .tasty-link-card {
-webkit-box-flex: 0;
flex: 0 0 33%; } }
.tasty-recipes-equipment .tasty-link-card p {
font-weight: bold;
font-size: 1em;
margin-bottom: 0; }
.tasty-recipes-equipment .tasty-link-card p a {
color: initial; }
.tasty-recipes-equipment .tasty-link-card span {
font-size: 0.9em; }
.tasty-recipes-rating.tasty-recipes-clip-10 {
-webkit-clip-path: polygon(0 0, 10% 0%, 10% 100%, 0% 100%);
clip-path: polygon(0 0, 10% 0%, 10% 100%, 0% 100%); }
.tasty-recipes-rating.tasty-recipes-clip-20 {
-webkit-clip-path: polygon(0 0, 20% 0%, 20% 100%, 0% 100%);
clip-path: polygon(0 0, 20% 0%, 20% 100%, 0% 100%); }
.tasty-recipes-rating.tasty-recipes-clip-30 {
-webkit-clip-path: polygon(0 0, 30% 0%, 30% 100%, 0% 100%);
clip-path: polygon(0 0, 30% 0%, 30% 100%, 0% 100%); }
.tasty-recipes-rating.tasty-recipes-clip-40 {
-webkit-clip-path: polygon(0 0, 40% 0%, 40% 100%, 0% 100%);
clip-path: polygon(0 0, 40% 0%, 40% 100%, 0% 100%); }
.tasty-recipes-rating.tasty-recipes-clip-50 {
-webkit-clip-path: polygon(0 0, 50% 0%, 50% 100%, 0% 100%);
clip-path: polygon(0 0, 50% 0%, 50% 100%, 0% 100%); }
.tasty-recipes-rating.tasty-recipes-clip-60 {
-webkit-clip-path: polygon(0 0, 60% 0%, 60% 100%, 0% 100%);
clip-path: polygon(0 0, 60% 0%, 60% 100%, 0% 100%); }
.tasty-recipes-rating.tasty-recipes-clip-70 {
-webkit-clip-path: polygon(0 0, 70% 0%, 70% 100%, 0% 100%);
clip-path: polygon(0 0, 70% 0%, 70% 100%, 0% 100%); }
.tasty-recipes-rating.tasty-recipes-clip-80 {
-webkit-clip-path: polygon(0 0, 80% 0%, 80% 100%, 0% 100%);
clip-path: polygon(0 0, 80% 0%, 80% 100%, 0% 100%); }
.tasty-recipes-rating.tasty-recipes-clip-90 {
-webkit-clip-path: polygon(0 0, 90% 0%, 90% 100%, 0% 100%);
clip-path: polygon(0 0, 90% 0%, 90% 100%, 0% 100%); }
.tasty-recipes-nutrition ul {
list-style-type: none;
margin: 0;
padding: 0; }
.tasty-recipes-nutrition ul:after {
display: block;
content: ‘ ‘;
clear: both; }
.tasty-recipes-nutrition li {
float: left;
margin-right: 1em; }
.tasty-recipes-plug {
text-align: center;
margin-bottom: 1em;
display: -webkit-box;
display: flex;
-webkit-box-align: center;
align-items: center;
-webkit-box-pack: center;
justify-content: center; }
.tasty-recipes-plug a {
text-decoration: none;
box-shadow: none; }
.tasty-recipes-plug a img {
width: 150px;
height: auto;
margin: 5px 0 0 8px;
display: inline-block; }
@media print {
.tasty-recipes-no-print,
.tasty-recipes-no-print * {
display: none !important; } }
.tasty-recipes {
margin-bottom: 4em;
max-width: 700px;
background-color: #f9f9f9;
}
.tasty-recipes.tasty-recipes-has-plug {
margin-bottom: 1em;
}
.tasty-recipes-plug {
margin-bottom: 4em;
}
.tasty-recipes-print-button {
display: none;
}
.tasty-recipes-image-shim {
height: 69.5px;
clear: both;
}
.tasty-recipes-entry-header {
background-color: #f9f9f9;
padding-top: 2em;
padding-left: 2em;
padding-right: 2em;
}
.tasty-recipes-entry-header.tasty-recipes-has-image {
padding-top: 0px;
}
.tasty-recipes-entry-header .tasty-recipes-image {
float: none;
margin-bottom: 1em;
}
@media only screen and (min-width: 730px) {
.tasty-recipes-entry-header .tasty-recipes-image {
float: left;
margin-right: 16px;
}
}
.tasty-recipes-entry-header .tasty-recipes-image img {
float: none;
height: 150px;
width: 150px;
}
.tasty-recipes-entry-header .tasty-recipes-header-content {
min-height: 215px;
}
.tasty-recipes-entry-header h2 {
margin-bottom: 0;
margin-top: 0;
padding-top: 0;
padding-bottom: 0;
clear: none;
}
.tasty-recipes-entry-header hr {
border: 1px solid #eee;
background-color: #eee;
margin-bottom: 0;
margin-top: 1em;
margin-right: -2em;
margin-left: -2em;
}
.tasty-recipes-entry-header .tasty-recipes-rating-outer {
width: 100%;
}
.tasty-recipes-entry-header .tasty-recipes-rating-outer a {
text-decoration: none;
border: none;
display: inherit;
box-shadow: none;
}
.tasty-recipes-entry-header .tasty-recipes-rating-outer a:hover {
text-decoration: none;
}
.tasty-recipes-entry-header .tasty-recipes-rating-stars {
font-size: 18px;
}
.tasty-recipes-entry-header .tasty-recipes-rating-stars span {
margin-right: 2px;
margin-left: 2px;
color: #aaaaaa;
}
.tasty-recipes-entry-header .tasty-recipes-rating-stars span:first-child {
margin-left: 0;
}
.tasty-recipes-entry-header .tasty-recipes-rating-label {
color: #B7BBC6;
font-size: .6875em;
margin-top: 1em;
position: absolute;
}
.tasty-recipes-entry-header .tasty-recipes-rating-stars .post-ratings {
font-size: 10px;
}
.tasty-recipes-entry-header .tasty-recipes-rating-stars .post-ratings .tasty-recipes-cf-ratings-label {
margin-top: 0;
line-height: 1;
}
.tasty-recipes-entry-header .tasty-recipes-details {
margin-top: 1.5em;
color: #606060;
}
.tasty-recipes-entry-header .tasty-recipes-details ul {
list-style-type: none;
margin: 0;
padding-left: 0;
}
.tasty-recipes-entry-header .tasty-recipes-details ul li {
display: inline-block;
margin-left: 0;
padding-left: 0;
margin-right: .5em;
margin-bottom: 0;
font-size: 1em;
line-height: 1.8em;
}
.tasty-recipes-entry-header .tasty-recipes-details .detail-icon {
height: 1em;
margin-top: .4em;
}
.tasty-recipes-entry-header .tasty-recipes-details ul li {
font-size: 1em;
}
.tasty-recipes-entry-header .tasty-recipes-details .tasty-recipes-label {
margin-right: .125em;
}
.tasty-recipes-entry-header .tasty-recipes-details .detail-icon {
vertical-align: top;
margin-right: .2em;
}
@media only screen and (min-width: 730px) {
.tasty-recipes-entry-header .tasty-recipes-details {
padding-left: 166px;
}
}
.tasty-recipes-entry-content {
padding-top: 0.1em;
background: #f9f9f9;
color: #606060;
clear: both;
}
.tasty-recipes-entry-header .tasty-recipes-buttons {
margin-top: 1.25em;
margin-bottom: 1.25em;
width: 100%;
}
.tasty-recipes-entry-header .tasty-recipes-buttons:after {
content: ” “;
display: block;
clear: both;
}
.tasty-recipes-entry-header .tasty-recipes-button-wrap {
box-sizing: border-box;
}
.tasty-recipes-entry-header .tasty-recipes-buttons a {
text-transform: uppercase;
text-align: center;
display: block;
background-color: #f9f9f9;
font-size: 1em;
line-height: 1.375em;
font-weight: bold;
padding-top: 7px;
padding-bottom: 7px;
margin-top: 0;
border: 1px solid #aaaaaa;;
border-radius: 0;
text-decoration: none;
color: #aaaaaa;
}
.tasty-recipes-entry-header .tasty-recipes-buttons .button:hover {
background-color: #f9f9f9;
border: 3px solid #aaaaaa;
color: #aaaaaa;
opacity: 1;
}
.tasty-recipes-entry-content a img {
box-shadow: none;
-webkit-box-shadow: none;
}
.tasty-recipes-entry-header .tasty-recipes-buttons a:hover {
background-color: #979599;
text-decoration: none;
}
.tasty-recipes-entry-header .tasty-recipes-buttons img {
vertical-align: top;
}
.tasty-recipes-entry-header .tasty-recipes-buttons img.svg-print,
.tasty-recipes-entry-header .tasty-recipes-buttons img.svg-pinterest {
height: 1.25em;
margin-right: .375em;
margin-bottom: 0;
background: none;
display: inline-block;
box-shadow: none;
}
@media only screen and (max-width: 730px) {
.tasty-recipes-entry-header .tasty-recipes-button-wrap {
width: 100%;
}
.tasty-recipes-entry-header .tasty-recipes-button-wrap:nth-child(2) {
padding-top: 1em;
}
}
@media only screen and (min-width: 450px) {
.tasty-recipes-entry-header .tasty-recipes-buttons {
width: 100%;
float: none;
}
.tasty-recipes-entry-header .tasty-recipes-button-wrap:first-child {
width: 50%;
padding-right: 5px;
float: left;
}
.tasty-recipes-entry-header .tasty-recipes-button-wrap:last-child {
width: 50%;
padding-left: 5px;
float: right;
padding-top: 0;
}
}
@media only screen and (min-width: 730px) {
.tasty-recipes-entry-header .tasty-recipes-buttons {
padding-left: 166px;
box-sizing: border-box;
}
.tasty-recipes-header-content {
position: relative;
}
.tasty-recipes-header-content .tasty-recipes-rating-outer {
position: absolute;
top: 155px;
width: 150px;
text-align: center;
}
.tasty-recipes-header-content .tasty-recipes-rating-label {
display: block;
position: static;
margin-top: 0;
}
}
.tasty-recipes-entry-content h3 {
color: initial;
}
.tasty-recipes-entry-content h4 {
font-size: 1em;
padding-top: 0;
margin-bottom: 1.5em;
margin-top: 1.5em;
}
.tasty-recipes-entry-content hr {
background-color: #eee;
border: 1px solid #eee;
margin-top: 1em;
margin-bottom: 1em;
}
.tasty-recipes-entry-content .tasty-recipes-description,
.tasty-recipes-entry-content .tasty-recipes-ingredients,
.tasty-recipes-entry-content .tasty-recipes-instructions,
.tasty-recipes-entry-content .tasty-recipes-keywords {
padding-left: 2em;
padding-right: 2em;
}
.tasty-recipes-entry-content .tasty-recipes-description p {
margin-bottom: 1em;
}
.tasty-recipes-entry-content .tasty-recipes-ingredients ul,
.tasty-recipes-entry-content .tasty-recipes-instructions ul {
list-style-type: none;
margin-left: 0;
margin-bottom: 1.5em;
padding: 0;
}
.tasty-recipes-entry-content .tasty-recipes-ingredients ul li,
.tasty-recipes-entry-content .tasty-recipes-instructions ul li {
margin-bottom: .625em;
list-style-type: none;
position: relative;
margin-left: 2.5em;
line-height: 1.46;
}
.tasty-recipes-entry-content .tasty-recipes-ingredients ul li:before,
.tasty-recipes-entry-content .tasty-recipes-instructions ul li:before {
background-color: #aaaaaa;
-webkit-border-radius: 50%;
-moz-border-radius: 50%;
border-radius: 50%;
height: .5em;
width: .5em;
display: block;
content: ” “;
left: -1.25em;
top: .375em;
position: absolute;
}
.tasty-recipes-entry-content .tasty-recipes-ingredients ol,
.tasty-recipes-entry-content .tasty-recipes-instructions ol {
counter-reset:li;
margin-left: 0;
padding: 0;
}
.tasty-recipes-entry-content .tasty-recipes-ingredients ol > li,
.tasty-recipes-entry-content .tasty-recipes-instructions ol > li {
list-style-type: none;
position: relative;
margin-bottom: 1em;
margin-left: 2.5em;
line-height: 1.46;
}
.tasty-recipes-entry-content .tasty-recipes-ingredients ol > li:before,
.tasty-recipes-entry-content .tasty-recipes-instructions ol > li:before {
content:counter(li);
counter-increment: li;
position: absolute;
background-color: #aaaaaa;
-webkit-border-radius: 50%;
-moz-border-radius: 50%;
border-radius: 50%;
height: 1.45em;
width: 1.45em;
color: #FFF;
left: -1.25em;
transform: translateX(-50%);
line-height: 1.5em;
font-size: .6875em;
text-align: center;
top: .1875em;
}
.tasty-recipes-entry-content .tasty-recipes-ingredients li li,
.tasty-recipes-entry-content .tasty-recipes-instructions li li {
margin-top: 0.625em;
}
.tasty-recipes-entry-content .tasty-recipes-ingredients li ul,
.tasty-recipes-entry-content .tasty-recipes-ingredients li ol,
.tasty-recipes-entry-content .tasty-recipes-instructions li ul,
.tasty-recipes-entry-content .tasty-recipes-instructions li ol {
margin-bottom: 0;
}
@media only screen and (max-width: 520px) {
.tasty-recipes-entry-content .tasty-recipes-ingredients ol,
.tasty-recipes-entry-content .tasty-recipes-instructions ol {
margin-left: 0;
}
}
.tasty-recipes-entry-content .tasty-recipes-equipment {
padding-left: 2em;
padding-right: 2em;
}
.tasty-recipes-entry-content .tasty-recipe-video-embed ~ .tasty-recipes-equipment {
padding-top: 1em;
}
.tasty-recipes-entry-content .tasty-recipes-notes,
.tasty-recipes-entry-content .tasty-recipes-nutrition {
padding-bottom: 1.25em;
padding-left: 2em;
padding-right: 2em;
}
.tasty-recipes-entry-content .tasty-recipes-notes ol {
counter-reset:li;
margin-left: 0;
padding: 0;
margin-bottom: 0;
}
.tasty-recipes-entry-content .tasty-recipes-notes ul {
margin-left: 0;
padding: 0;
margin-bottom: 0;
}
.tasty-recipes-entry-content .tasty-recipes-notes p,
.tasty-recipes-entry-content .tasty-recipes-notes ul li,
.tasty-recipes-entry-content .tasty-recipes-notes ol li {
padding-left: 1.5625em;
padding-right: 1.5625em;
padding-top: 1.25em;
padding-bottom: 1.25em;
position: relative;
margin-bottom: 1.5em;
list-style-type: none;
}
.tasty-recipes-entry-content .tasty-recipes-notes p,
.tasty-recipes-entry-content .tasty-recipes-notes ul li,
.tasty-recipes-entry-content .tasty-recipes-notes ol li {
padding-left: 2.5em;
margin-left: 0;
margin-bottom: 0;
}
.tasty-recipes-entry-content .tasty-recipes-notes p:before,
.tasty-recipes-entry-content .tasty-recipes-notes ul li:before {
content: “i”;
display: block;
background-color: #aaaaaa;
-webkit-border-radius: 50%;
-moz-border-radius: 50%;
border-radius: 50%;
height: 1.3em;
width: 1.3em;
font-size: .75em;
line-height: 1.3em;
text-align: center;
color: #FFF;
position: absolute;
left: 1.167em;
top: 2.1em;
}
.tasty-recipes-entry-content .tasty-recipes-notes ol > li:before {
content:counter(li);
counter-increment: li;
position: absolute;
background-color: #aaaaaa;
-webkit-border-radius: 50%;
-moz-border-radius: 50%;
border-radius: 50%;
height: 1.45em;
width: 1.45em;
color: #FFF;
left: 2em;
transform: translateX(-50%);
line-height: 1.5em;
font-size: .6875em;
text-align: center;
top: 2.3em;
}
.tasty-recipes-entry-content .tasty-recipes-notes p:last-child {
margin-bottom: 0;
}
.tasty-recipes-entry-content .tasty-recipes-keywords {
margin-top: 1em;
margin-bottom: 1em;
color: #aaaaaa;
}
.tasty-recipes-entry-content .tasty-recipes-keywords p {
margin-bottom: 0;
font-size: 0.7em;
}
.tasty-recipes-nutrifox {
text-align: center;
margin: 0;
}
.tasty-recipes-nutrifox iframe {
width: 100%;
display: block;
margin: 0;
}
.tasty-recipes-entry-content .tasty-recipes-nutrition ul li {
float: none;
line-height: 2em;
list-style-type: none;
margin-left: 0;
padding-left: 0.833em;
}
.tasty-recipes-entry-footer {
background-color: #fff;
padding-top: 1.5625em;
padding-bottom: 1.25em;
padding-left: 2.5em;
padding-right: 2.5em;
text-align: center;
}
.tasty-recipes-entry-footer .tasty-recipes-footer-content {
display: inline-block;
}
.tasty-recipes-entry-footer img {
width: 65px;
}
.tasty-recipes-entry-footer h3 {
font-size: 1.25em;
line-height: 2.25em;
margin-top: .5em;
margin-bottom: .125em;
padding: 0;
line-height: 1em;
}
.tasty-recipes-entry-footer p {
margin-bottom: 0;
font-size: .75em;
}
.tasty-recipes-entry-footer p a {
text-decoration: underline;
box-shadow: none;
border-bottom: none;
}
.tasty-recipes-entry-footer:after {
content: ” “;
display: block;
clear:both;
}
@media only screen and (max-width: 520px) {
.tasty-recipes-entry-footer h3 {
margin-top: .5em;
margin-bottom: .5em;
}
.tasty-recipes-entry-footer {
text-align: center;
}
}
@media only screen and (min-width: 520px) {
.tasty-recipes-entry-footer img {
float: left;
}
.tasty-recipes-entry-footer h3,
.tasty-recipes-entry-footer p {
margin-left: 90px;
clear: none;
text-align: left;
}
}
.clearfix:after {
clear: both;
content: ” “;
display: table;
}
/* Print view styles */
.tasty-recipes-print-view {
font-size: 11px;
}
.tasty-recipes-print-view .tasty-recipes-print-button {
display: inline-block;
}
.tasty-recipes-print {
padding:0;
}
.tasty-recipes-print-view .tasty-recipes,
.tasty-recipes-print-view .tasty-recipes-entry-content {
background: #fff;
}
.tasty-recipes-print-view .tasty-recipes {
margin-top: 1em;
}
.tasty-recipes-print .tasty-recipes-entry-header {
background-color: inherit;
color: inherit;
padding-bottom: 0;
padding-left: 1em;
padding-right: 1em;
}
.tasty-recipes-print .tasty-recipes-entry-header .tasty-recipes-image {
transform: none;
float: left;
margin-right: 16px;
}
.tasty-recipes-print-view .tasty-recipes-entry-header .tasty-recipes-header-content {
min-height: 150px;
}
.tasty-recipes-print.tasty-recipes-has-image .tasty-recipes-entry-header h2 {
margin-top: 0;
}
.tasty-recipes-print .tasty-recipes-entry-header h2 {
color: inherit;
margin-bottom: .5em;
}
.tasty-recipes-print .tasty-recipes-entry-header hr {
display: none;
}
.tasty-recipes-print .tasty-recipes-header-content .tasty-recipes-rating-outer {
position: initial;
text-align: left;
width: unset;
top: unset;
}
.tasty-recipes-print .tasty-recipes-entry-header .tasty-recipes-rating-stars span {
color: #000;
}
.tasty-recipes-print .tasty-recipes-entry-header .tasty-recipes-details ul {
padding: 0;
clear: none;
}
.tasty-recipes-print .tasty-recipes-entry-header .tasty-recipes-details ul li {
line-height: 1.8em;
margin-bottom: 0;
}
.tasty-recipes-print .tasty-recipes-entry-header .tasty-recipes-details .detail-icon {
display: none;
}
.tasty-recipes-print-view .tasty-recipes-source-link {
text-align: center;
}
.tasty-recipes-print-view .tasty-recipes-entry-content .tasty-recipes-ingredients ul li,
.tasty-recipes-print-view .tasty-recipes-entry-content .tasty-recipes-instructions ul li,
.tasty-recipes-print-view .tasty-recipes-entry-content .tasty-recipes-ingredients ol li,
.tasty-recipes-print-view .tasty-recipes-entry-content .tasty-recipes-instructions ol li {
margin-bottom: 0;
}
.tasty-recipes-print-view .tasty-recipes-entry-content .tasty-recipes-notes p,
.tasty-recipes-print-view .tasty-recipes-entry-content .tasty-recipes-notes ul li,
.tasty-recipes-print-view .tasty-recipes-entry-content .tasty-recipes-notes ol li {
margin-top: 1rem;
padding-top: 0;
padding-bottom: 0;
}
.tasty-recipes-print-view .tasty-recipes-entry-content .tasty-recipes-notes p:before,
.tasty-recipes-print-view .tasty-recipes-entry-content .tasty-recipes-notes ul li:before {
top: 0.1em;
}
Description
These molten cookie dough cupcakes are homemade vanilla cupcakes filled with cookie dough and topped with chocolate chip cookie dough buttercream. Review the recipe notes and information about safe-to-eat flour before beginning.
Ingredients
Cookie Dough
- 2 and 1/4 cups (280g) heat-treated all-purpose flour* (spoon & leveled)
- 2 and 1/4 teaspoons cornstarch
- 3/4 teaspoon salt
- 3/4 cup (12 Tbsp; 170g) unsalted butter, softened to room temperature
- 1 cup (200g) packed light or dark brown sugar
- 1/3 cup (80ml) pasteurized egg whites, at room temperature*
- 2 teaspoons pure vanilla extract
- 1 cup (180g) mini semi-sweet chocolate chips
Cupcakes
- 1 and 3/4 cups (215g) all-purpose flour (spoon & leveled)
- 1 teaspoon baking powder
- 1/4 teaspoon baking soda
- 1/2 teaspoon salt
- 1/2 cup (120ml) whole milk, at room temperature
- 1/2 cup (120g) sour cream, at room temperature
- 1/2 cup (1 stick; 115g) unsalted butter, softened to room temperature
- 1 cup (200g) granulated sugar
- 1/3 cup (80ml) pasteurized egg whites, at room temperature*
- 2 teaspoons pure vanilla extract
Cookie Dough Buttercream
- 1 cup (2 sticks; 230g) unsalted butter, softened to room temperature
- 2 teaspoons pure vanilla extract
- 1 Tablespoon heavy cream or milk
- 1 teaspoon salt
- 3 cups (360g) confectioners’ sugar, sifted
- optional garnish: reserved cookie dough, sprinkles, and/or chocolate chips
Instructions
- Make the cookie dough: In a medium bowl, whisk the heat-treated flour, cornstarch, baking soda, and salt together. Set aside.
- Using a handheld or stand mixer fitted with the paddle attachment, beat the butter on medium speed in a large bowl until smooth and creamy, about 2 minutes. Add the granulated and brown sugars and mix on medium until light and fluffy, about 3 full minutes. Using a rubber spatula, scrape down the sides and up the bottom of the bowl as needed. Add the egg whites and vanilla extract and mix until fully incorporated, about 2 minutes.
- Add half of the flour mixture and mix on low just until the powdery texture of the flour disappears, about 15 seconds. Immediately add the rest of the flour mixture and mix until combined. Remove the bowl from the mixer and use a rubber spatula to fold in the chocolate chips.
- Freeze or refrigerate the cookie dough for 15 minutes or until the dough is easy to handle. Roll the dough into 12 one-Tablespoon-size balls, place on a plate lined with parchment paper, then refrigerate until step 9. Cover the remaining cookie dough and set aside at room temperature.
- Preheat the oven to 350°F (177°C). Line a 12-cup muffin pan with cupcake liners.
- Make the cupcakes: Whisk the flour, baking powder, baking soda, and salt together in a medium bowl. In a small bowl, whisk the milk and sour cream together until smooth. Set aside.
- Using a handheld or stand mixer fitted with the paddle attachment, beat the butter and sugar together on medium speed in a large bowl until light and fluffy, about 3 minutes. Using a rubber spatula, scrape down the sides and up the bottom of the bowl as needed. Add the egg whites and vanilla and beat for 2 minutes, or until the mixture is totally incorporated. With the mixer on low, alternate additions of the flour mixture and the sour cream mixture, starting and ending with flour. Beat for an additional 30 seconds or until the batter appears smooth and creamy.
- Fill cupcake liners about 3/4 full. Bake for 16-19 minutes or until the cupcake edges are golden brown and a toothpick inserted in the center comes out clean. Remove from the oven and let cool in the pan for 5 minutes.
- Remove cupcakes from the pan and carefully press 1 chilled cookie dough ball into the center of each cupcake. The dough ball might not sit completely flat, so expect a little lump on top. Don’t worry, you’ll cover it with frosting. Cool cupcakes completely.
- While the cupcakes cool, make the cookie dough buttercream: Using a handheld or stand mixer fitted with the paddle attachment, beat the butter in a large bowl on medium speed for 3 minutes, or until light, fluffy, and completely smooth. Add the vanilla extract, milk, and salt and beat until combined. Using a rubber spatula, scrape down the sides and up the bottom of the bowl as needed. Add the confectioners’ sugar, then beat on low speed for 15 seconds. Switch to medium-high speed and beat the frosting until super light and fluffy, about 4-5 minutes. The frosting will become lighter in color as air is whipped into it.
- Break the dough into quarter-size chunks. (If desired, save enough dough to make 12 little cookie dough balls as garnish on top!) With the mixer running on medium speed, add the cookie dough chunks. Mix just until incorporated– some chunks can remain.
- Once the cupcakes are completely cool, top with frosting. You can spread the frosting with a knife or icing spatula or apply with a large round piping tip. (The cookie dough chunks will get stuck in a smaller tip.) Decorate with garnishes, if desired.
- Leftover cupcakes keep well covered tightly in the refrigerator for 3 days.
Notes
- Make Ahead & Freezing Instructions: Plain cupcakes can be made ahead 1 day in advance, covered, filled with cookie dough balls, and stored in the refrigerator overnight. Buttercream can also be made 1 day in advance, covered, and stored in the refrigerator until ready to use. Bring cupcakes and buttercream to room temperature before frosting. Freeze frosted, unfrosted, filled, or unfilled cupcakes for up to 2-3 months. Thaw overnight in the refrigerator.
- Heat Treated Flour: See note/instructions above recipe or purchase it online.
- Pasteurized Egg Whites: You can purchase pasteurized egg whites in a carton at most major grocery stores. Check the dairy section or near where the eggs are sold. A great brand to look for is AllWhites. Do not purchase products with egg whites and yolks combined, as those are not recommended for Kristen’s dough recipes. Or you can pasteurize the egg whites yourself– lots of easy tutorials if you give it a quick search online! If you’d rather not use egg whites, substitute 2 Tablespoons cornstarch whisked with 1/3 cup room temperature milk. Whole milk is best, but 2% or even nondairy milks work too.
- Whole Milk & Sour Cream: Whole milk and sour cream are strongly recommended for the best taste and texture. A full fat plain yogurt would work instead, though the cupcakes may not be as light. Same goes with a lower fat milk.
- Why Room Temperature? All refrigerated items should be at room temperature so the batter mixes together easily and evenly. Read here for more information.
- Special Tools: KitchenAid Stand Mixer, Cupcake Pan, Cupcake Liners, Ateco 808 Piping Tip, Piping Bags
- Be sure to check out my 10 tips for baking the BEST cupcakes before you begin!
Keywords: cookie dough, cookies, cupcakes