
Superfoods that are popular are often high in carbs, even if they are healthy and…
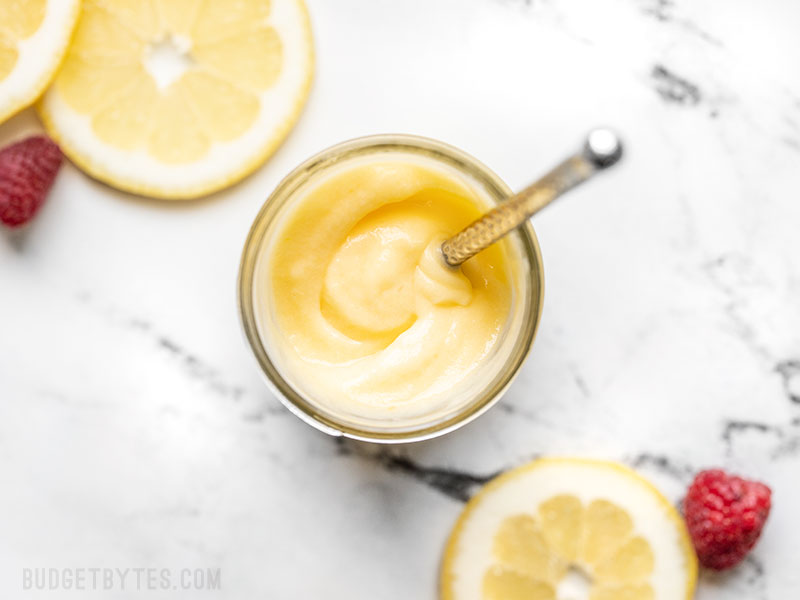
Luscious Homemade Lemon Curd
Luscious might be an understatement. It’s kind of mind blowing how four of the most basic ingredients in your kitchen can make something so beyond delicious as this homemade lemon curd, but somehow they do. With just a small sauce pot, a whisk, and four simple ingredients you can make a little jar of velvety sunshine to spread or dollop on top of all your food. And now that I know how fast and easy it is, and that you can freeze it, I will never pay $4 for a jar of it at the store ever again.

What is Lemon Curd??
Curd is one of those unfortunate words, like “moist,” that never really sounds appetizing. BUT I promise you, this stuff is heaven. Lemon curd is dessert spread, kind of like a lemon custard, or like a sweet version of hollandaise sauce (I hope I didn’t lose you there). It tastes a LOT like the filling for lemon squares (did I get you back on board?). It’s super rich and smooth, but still light and bursting with fresh lemon flavor.
What is Lemon Curd Used For?
EVERYTHING. Well, almost. You can use lemon curd anywhere you use jam or preserves, so on toast, biscuits, scones, etc. It’s also a great topper for yogurt, oats, parfaits, cakes, pies, cookies, donuts, pancakes, waffles, crepes, need I go on? Anywhere you want lemon flavor, grab a spoonful of your homemade lemon curd.
Homemade Lemon Curd Methods
I made approximately 578 batches (exaggeration) of lemon curd this week, testing all sorts of methods from the microwave to the stove top, adding ingredients in all sorts of different orders, but I found that the method below created the silkiest, lightest, and smoothest homemade lemon curd without an excessive amount of work (only about 10 minutes compared to 2 minutes for the microwave version).
So be aware that there are a million ways to make homemade lemon curd, but the method below is my favorite. It’s actually quite similar to the way I make hollandaise sauce (see Almost Eggs Benedict).

Fresh vs. Bottled Lemon Juice
Fresh squeezed lemon juices is and always will be better than bottled, but during my one million test runs of this recipe I found that bottled lemon juice did not make my lemon curd any less delicious. I don’t know if it’s all the sugar and butter, but I didn’t notice a massive difference between fresh and bottled in this recipe. So unless you have some lemons in your freezer that you’re trying to use up, save yourself some trouble and pour your lemon juice instead of squeezing it.
That being said, if you are using fresh lemons, go ahead and zest your lemon before juicing it. Adding lemon zest to the lemon curd will make a marked difference in the flavor. ?
How Long Does Homemade Lemon Curd Last?
This homemade lemon curd will last in your fridge for 1-2 weeks, but you can also freeze it! You guys know how I love freezing everything. In the freezer the lemon curd will last at least a few months and the beautiful part is that it only hardens about as much as ice cream, so you can scoop it out as needed.
And that’s where I’m really in danger. When I scooped a spoonful of frozen lemon curd today to test its freezer durability, it tasted a LOT like a really rich lemon sorbet. So I’m going to have to stop myself from eating this as a frozen dessert. ?
Luscious Homemade Lemon Curd
This luscious homemade lemon curd only takes four simple ingredients, about 10 minutes, and tastes like velvet sunshine in a jar.
Prep Time: 5 mins
Cook Time: 5 mins
Total Time: 10 mins
Servings: 8 2 Tbsp each
- 1/4 cup sugar ($0.08)
- 1 large egg ($0.25)
- 1/3 cup lemon juice ($0.16)
- 4 Tbsp butter ($0.54)
-
Add the sugar, egg, and lemon juice to a small sauce pot. Before placing the pot over the heat, whisk the ingredients together until smooth.
-
Place the pot over medium heat and cook while whisking continuously. The mixture will become very frothy as you whisk. When the liquid becomes hot enough to cook the egg, the mixture will begin to thicken and no more liquid will separate from the foam. It will take about 5 minutes of whisking over medium heat for the mixture to thicken, but will vary depending on your cookware. The mixture should be thick enough to coat a spoon (see photos below).
-
Remove the pot from the heat. Add one tablespoon of butter at a time, whisking until it has fully melted into the sauce before adding the next. As the butter is melted into the sauce, it will become less frothy and more silky in texture, and look more glossy rather than foamy.
-
Once all of the butter has been whisked in, transfer the lemon curd to an air-tight container and refrigerate until completely cooled. The curd will thicken further upon cooling.
Do not use aluminum cookware, as this can be reactive with the lemon juice.
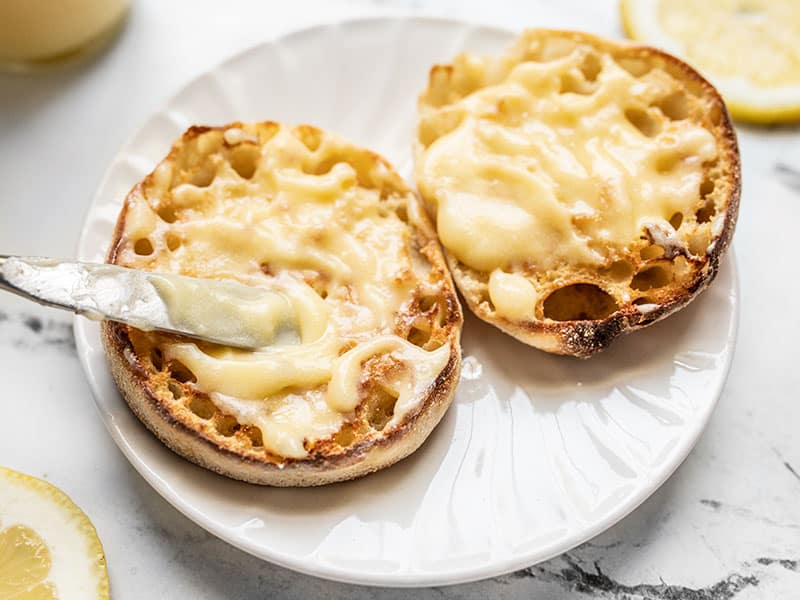
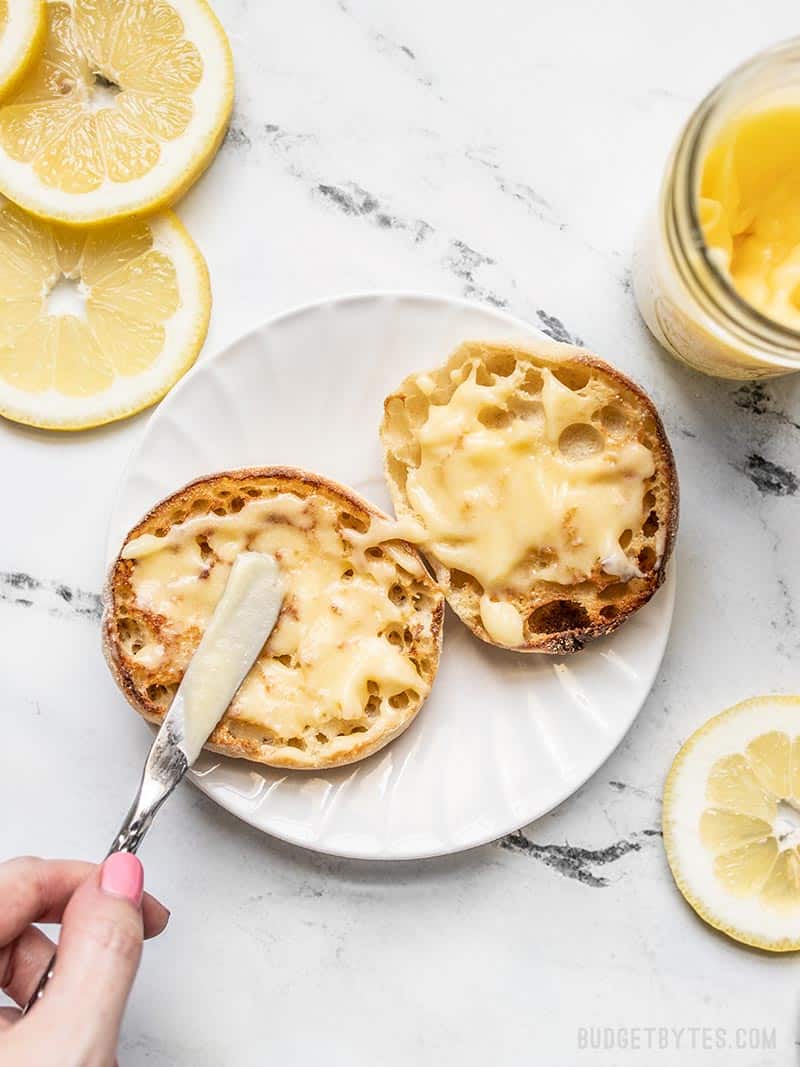
I love spreading my homemade lemon curd on English muffins. Since it already has tons of butter in it, it’s almost like butter and jam rolled into one!

Step by Step Photos
I’m adding a few more step by step photos than usual, since I really want you to see the texture changes that occur during this process. Lemon curd is easy to make, but you have to use your eyes to know when it’s time to move on to the next step.
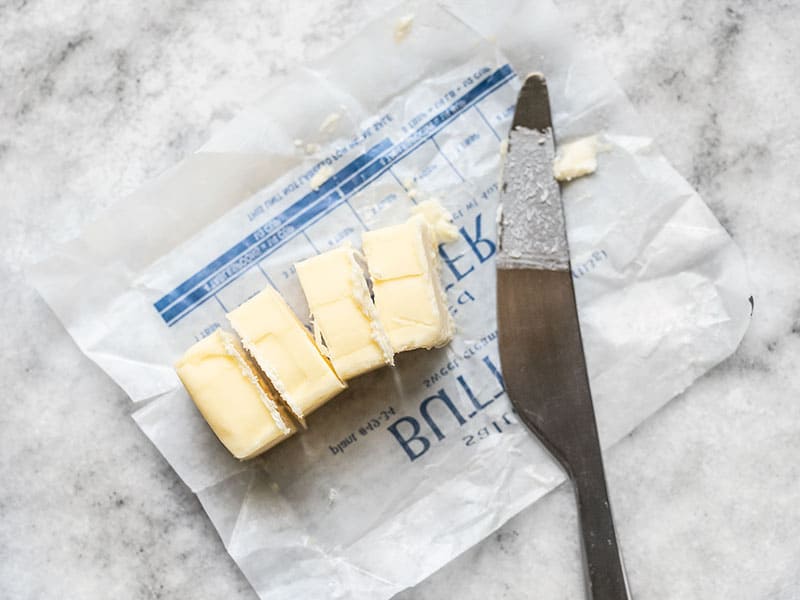
It can be helpful, but is not critical, to take your butter out of the refrigerator and slice into 1 tablespoon pieces before you begin. Letting it warm up slightly can make it easier to melt into the sauce later.
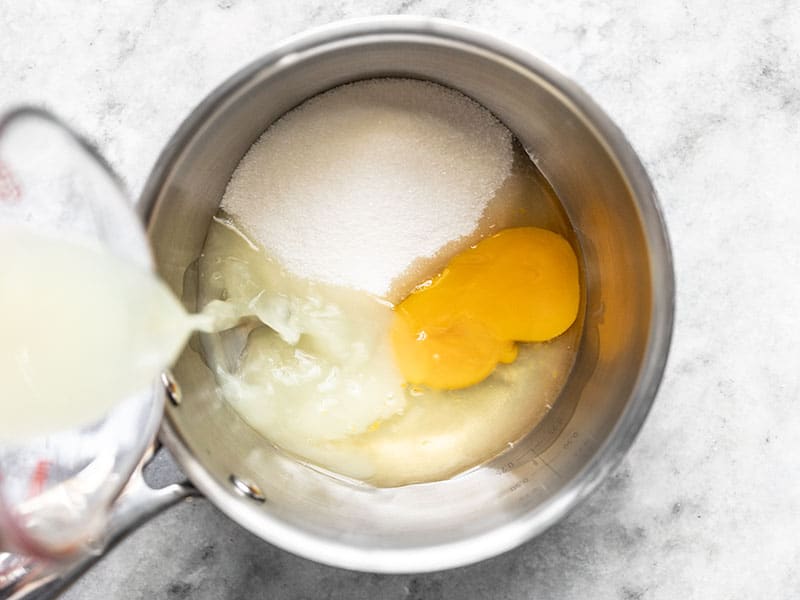
Add 1/4 cup sugar, one large egg, and 1/3 cup lemon juice to a small sauce pot.
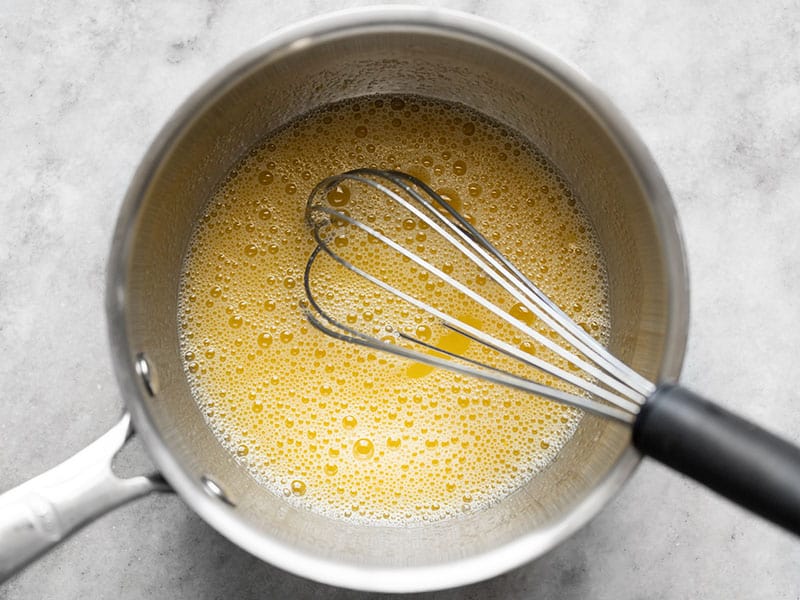
Before placing the pot over heat, whisk the sugar, egg, and lemon juice together until smooth.
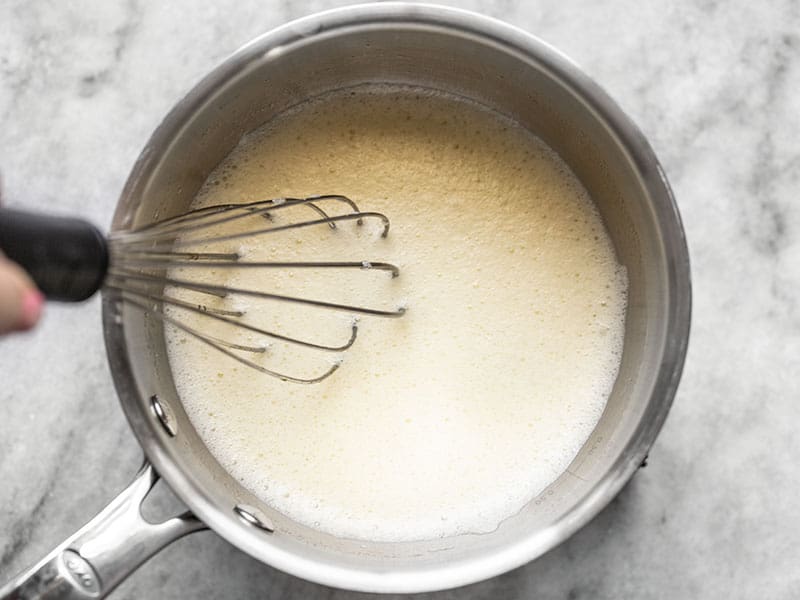
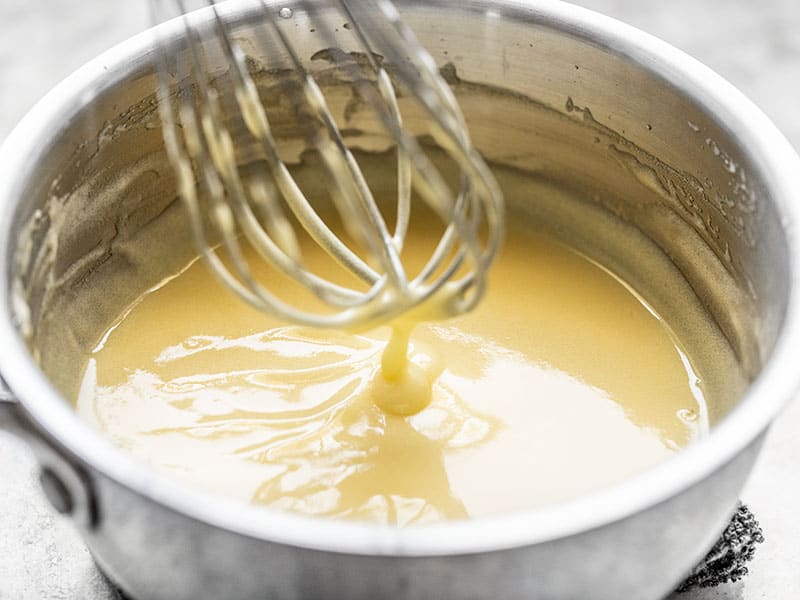
Place the pot over medium heat and begin to whisk continuously. You’ll be whisking for about five minutes until the mixture thickens. It will get very frothy as you cook and whisk and will seem like nothing is happening, but once it reaches the magic temperature it will almost suddenly thicken. The photo above is when the mixture was at the half-way point. Very frothy on top, but there was still a layer of liquid under the froth.
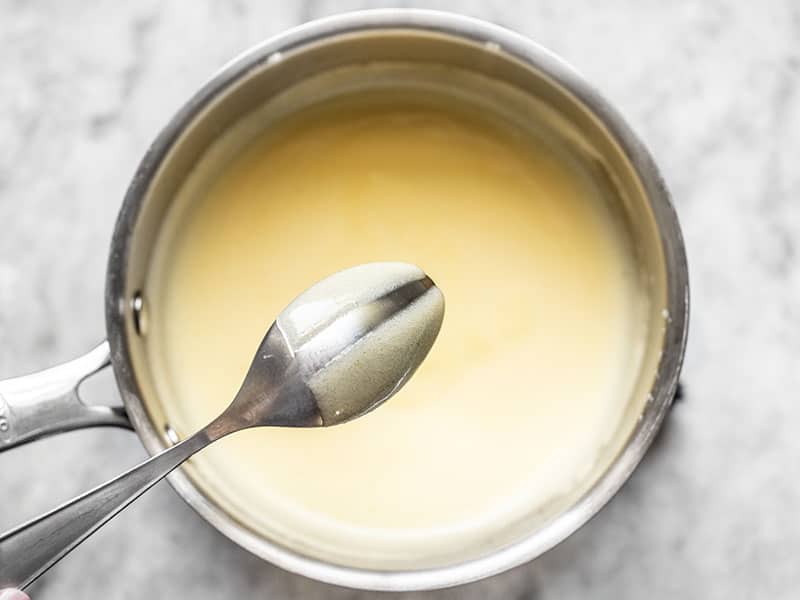
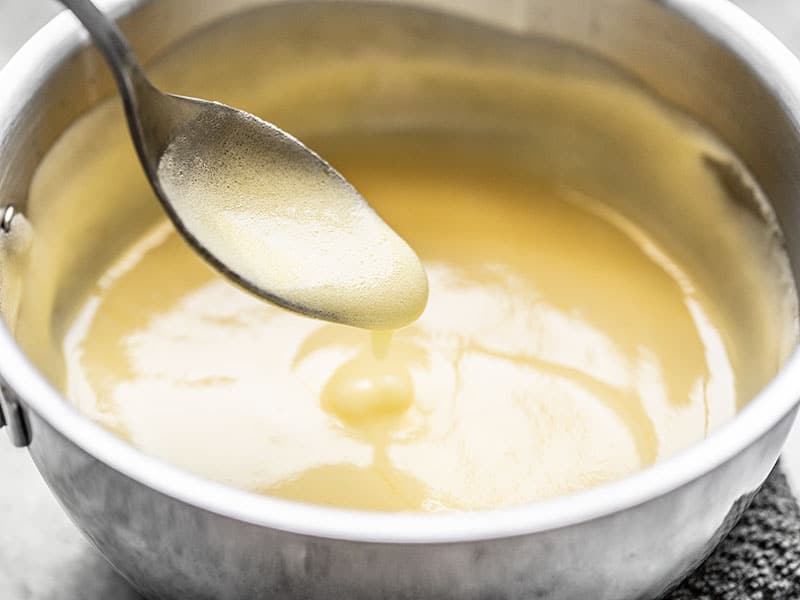
When the mixture gets hot enough, the egg will begin to thicken the sauce and the entire mixture will become thick and frothy, with no layer of liquid on the bottom. It should be thick enough to coat the back of a spoon. When you drag your finger through the mixture on the spoon, the sauce should stay put and not run back to fill in the line.
Here is another view of what it looks like once thickened. It’s still very frothy in texture. There is no liquid on the bottom of the pot. It’s all thick froth. When it reaches this point, remove the pot from the heat.
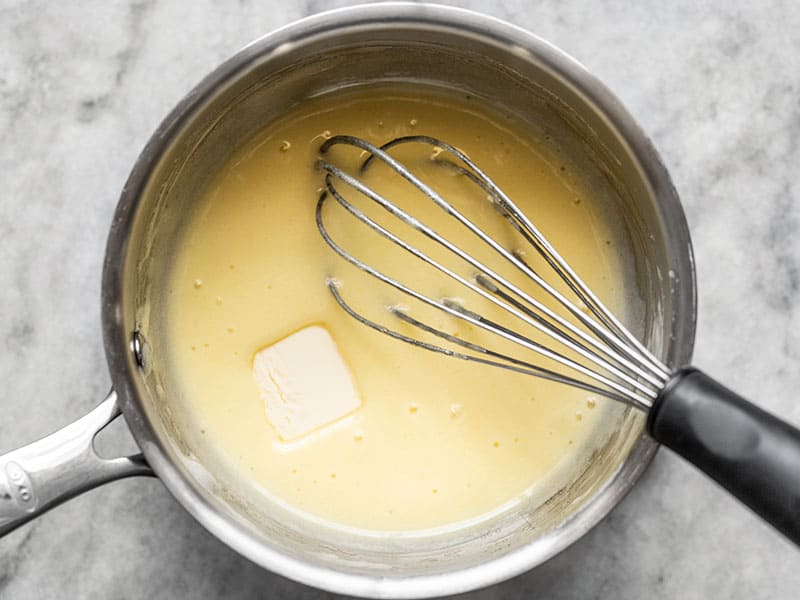
Whisk one tablespoon of butter into the sauce, making sure it is fully melted (from the residual heat of the sauce) before adding the next tablespoon. As you whisk in the butter the sauce will become less frothy and more silky. It will also look a little more glossy and translucent, and less white/opaque.
Here is what it looks like once all of the butter has melted in. More glossy and translucent, less frothy. While the lemon curd is fairly thick at this point, it thickens further once refrigerated.
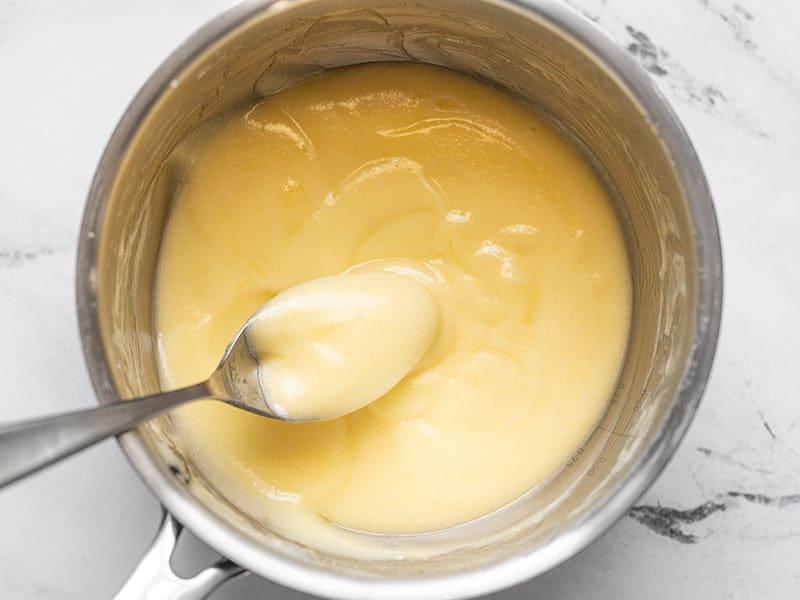
The flavor also mellows a bit as it refrigerates. It’s quite sour at this point but it gets creamier as it refrigerates.

You can refrigerate the lemon curd for 1-2 weeks, OR freeze it for a few months.
You can scoop frozen lemon curd out as needed, and it will thaw quickly at room temperature.
I’ve died and gone to lemon heaven. ☀️??
Related Posts
Related Posts


