
Superfoods that are popular are often high in carbs, even if they are healthy and…
extra-flaky pie crust
[Welcome back to ✨ Newer, Better Month ✨ on Smitten Kitchen, when I get update a few SK classics with new knowledge, new techniques, and with real-life time constraints in mind. Previously.]
The concept of “newer better” is always going to be relative, and no more so than in this recipe. For all of the years I’ve been cooking, I’ve made pie dough one way. I shared the recipe with you in 2008, have referenced it in every recipe for pie since, and, until a couple years ago, never veered from it. My recipe is not an outlier; it contains the same ingredient ratios as 99% of American-style pie crust recipes out there. There might be variations in types of fats, preferred flours, sometimes there’s a little buttermilk or apple cider vinegar instead of some of the water or a little more or less sugar and salt, but they’re almost all the same ratio of fat to flour to water. It makes a great pie crust. Here’s where the relativity comes in: If you make pie crusts the way I’ve long made pie crusts and you’re happy with these pies, stop reading now. There’s nothing to see here! This isn’t for you! This is for people who have tried that fairly standard formula and found it lacking. A little tough. Not flaky enough. It comes up! I’m listening.
So let’s talk about what that last one percent of pie doughs do differently. It’s not the butter or the liquid; by and large, these recipes use the same amount. It’s the flour — they use less. If you’re thinking, “but if you use less flour and the same amount of butter and water, the dough might be stickier and harder to work with?” — you are correct. I began auditioning these lighter-on-the-flour doughs a few years ago and found them a little pesky and if you’re wondering if “pesky” is smiled through gritted teeth, well, you are correct again. And I feel pretty comfortable with butter-flour doughs! What does this mean for people who do not? Given that making pie dough at all from scratch is even for some of the most skilled home cooks a hurdle they do not wish to surmount (hi mom!), why suggest a trickier recipe? Why raise the hurdle? (Why download DuoLingo and start with Russian, Deb? Ahem, I digress.)

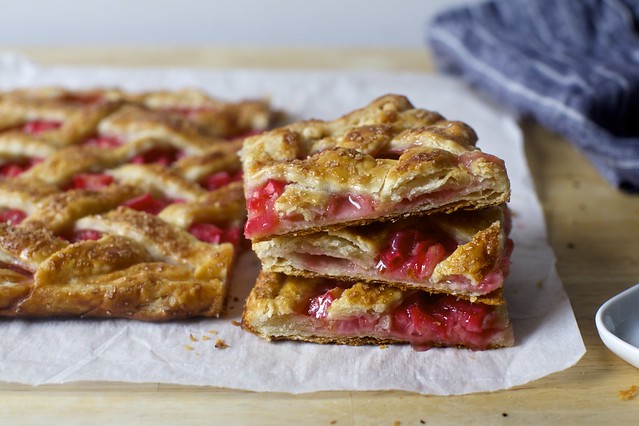
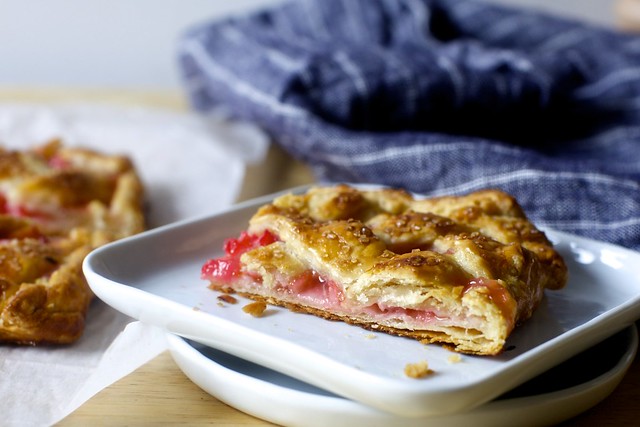
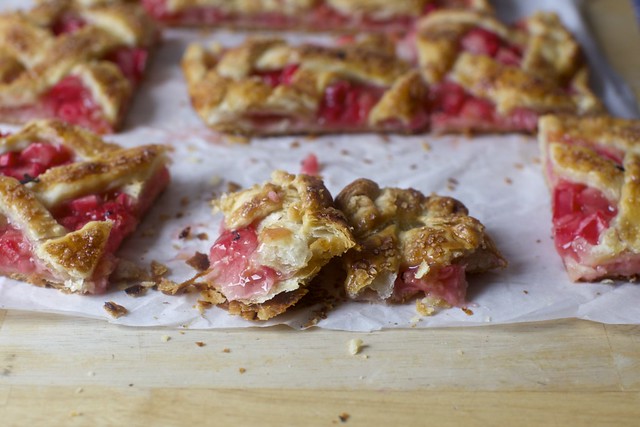
It’s because it’s worth it. This is the croissant-flaky pie dough of dreams. If my eyes were closed, I would not know that I wasn’t biting into puff pastry, which shatters into thousands of featherweight-but-crisp shards on impact. It’s undeniably flakier, but also of course it is: less flour means less weight, less density. And yes, it softens up a little faster. You’ll need more flour to keep it loose from the counter when rolling it out. A little folding improves structure and increases the expansion of flaky layers. These were small adjustments I had to make to get the hang of it but it’s absolutely worth it because you get this when you’re done:
And this.
Also this.
And you made this with your hands! It took 5 minutes to assemble and 5 minutes to roll out. You did this. You’re amazing. Honestly, I always knew you had it in you.
Previously
One year ago: Sweet Potato Tacos
Two years ago: Punjabi-Style Black Lentils
Three years ago: Churros
Four years ago: Red Bean and Green Grain Taco Bowl
Five years ago: Broccoli, Cheddar and Wild Rice Casserole
Six years ago: My Favorite Buttermilk Biscuits
Seven years ago: Potato Knish, Two Ways
Eight years ago: The Best Baked Spinach
Nine years ago: Thick, Chewy Granola Bars and Arroz con Leche (Rice Pudding)
Ten years ago: Thick, Chewy Oatmeal Raisin Cookies, Key Lime Coconut Cake, and Steak Sandwiches
Eleven years ago: Alex’s Chicken and Mushroom Marsala, Almond Biscotti
Twelve years ago: Mediterranean Eggplant and Barley Salad
And for the other side of the world:
Six Months Ago: Flapjacks
1.5 Years Ago: Marbled Banana Bread
2.5 Years Ago: Even More Perfect Blueberry Muffins and Plum Squares with Marzipan Crumble
3.5 Years Ago: Caponata and Zucchini Rice and Cheese Gratin
4.5 Years Ago: Corn Cheddar and Scallion Strata and Chocolate and Toasted Hazelnut Milk
Extra-Flaky Pie Crust
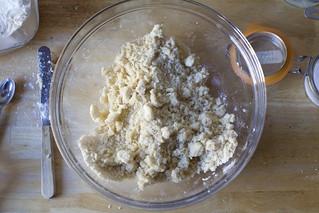
Previously, my pie dough rules were: use all butter (it’s very flaky if used well, and tasty too), keep everything cold, use a pastry blender, work the butter into the flour until the largest bits are the size of small peas, and only use enough water to pull the dough together. I am still loyal to all-butter crusts, but I’ve come around to mixing your dough with your fingers (with a satisfying squash of each cube, although I’m never giving up my pastry blender), I’ve added a little folding to the rolling-out steps, which improves structure and increases the expansion of flaky layer, and that with this, you can get away with leaving the butter in larger, lima bean-sized pieces. Finally, I actually get the dough pretty damp — you’ll be sure it’s too soft and sticky, but I promise, it’s not — and it’s not a problem at all. In fact, because we’re using a higher proportion of butter in this dough, and butter is very hard when it’s cold, I find that this extra moisture makes what would otherwise be a very firm dough easier to roll.
Many thanks to Stella Park’s No-Stress, Super-Flaky Pie Crust technique for helping me overcome my stubborness/showing me the light about wetter doughs and folded roll-outs.
- 2 cups (260 grams) all-purpose flour
- 1 tablespoon (15 grams) granulated sugar
- 3/4 teaspoon fine sea or table salt
- 1 cup (230 grams, 8 ounces, or 16 tablespoons) cold, unsalted butter
- 1/2 cup (120 grams) very cold water
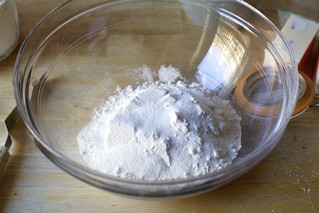
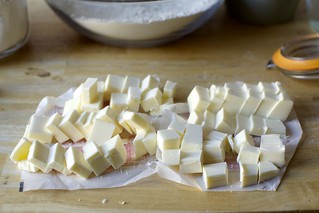
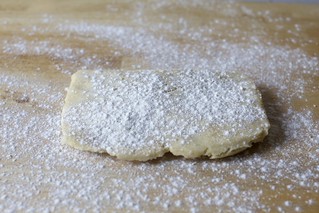
Place your flour, sugar, and salt in a large bowl and whisk to combine. Cut your butter into small cubes (1/2-inch is ideal here) and add them into the flour mixture. Toss them around so that they’re coated and used your fingers to squash each butter cube into flatter, lima-bean like pieces. It’s totally fine if this is bigger than you’re used to.
[You could also use a pastry blender, stand mixer, or a food processor, but go very easy on it, especially the food processor — you want flat-ish, lima bean-sized pieces of butter, not the usual “coarse meal” or “small pea-sized” mixture. If using a food processor, when you’re done, dump this butter-flour mixture into a large bowl before continuing.]
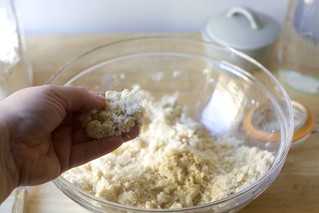
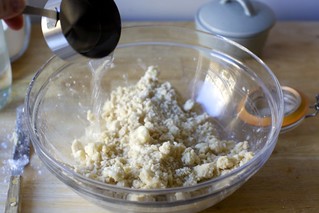
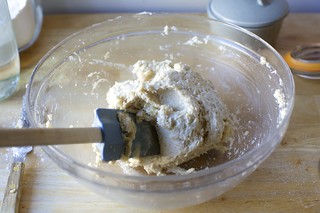
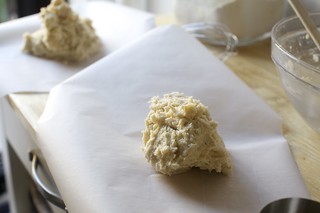
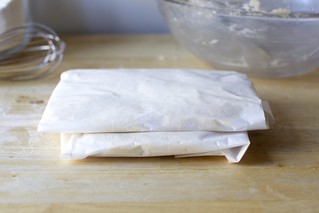
Pour water over butter-flour mixture and use a flexible silicone spatula or scraper to bring it together into a dough that will seem too wet and sticky, but will be just fine. Divide dough into two parts, and wrap each half into flat-ish packets wrapped in plastic, waxed or parchment paper.
Chill in the fridge until firm — one to two hours.
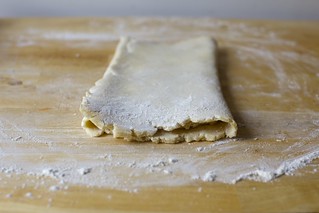
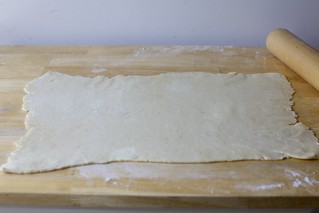
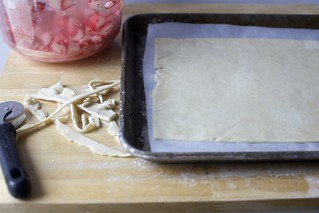
Unwrap first packet of dough, place on a well-floured counter, sprinkle the top generously with flour, and roll it out into a thick-ish long rectangle. Brush of excess flour off dough with your hands and fold it as you would a business letter, into thirds. Continue to roll this packet into the shape needed for your final pie — shown here 10×15-inch, but a 14-inch round is the usual size for a standard pie crust.
From here, you’ll want to follow the instructions for the pie you’re making. Looking for ideas? Start here!
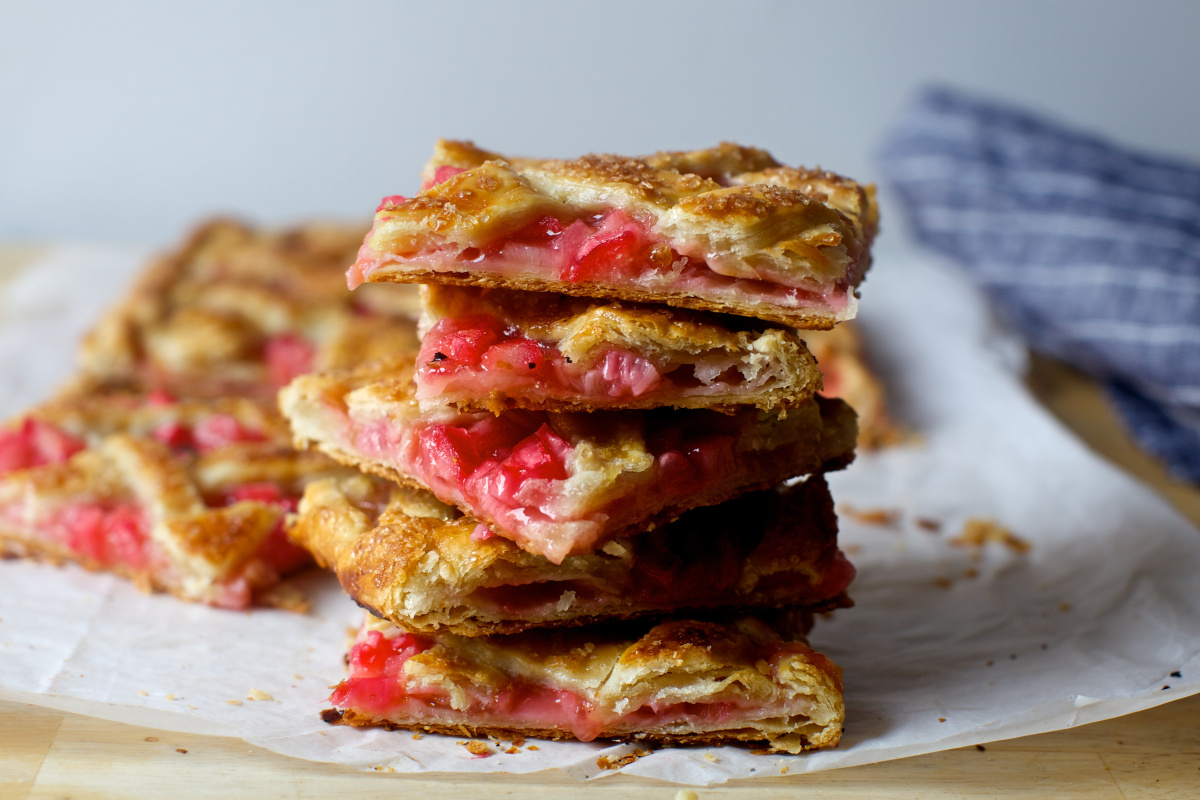
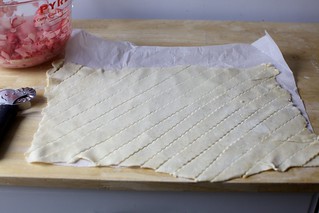
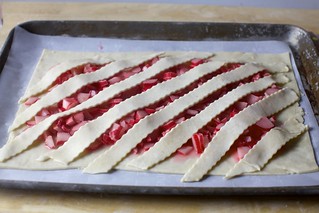
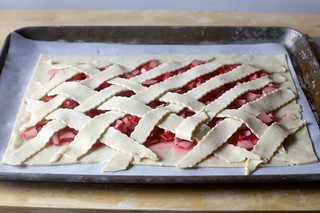
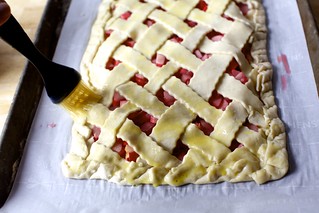
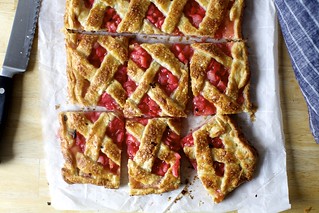
A fun breakfast pastry I only made to showcase this awesome pie crust but actually ended up abundantly flaky and just a little sweet: Heat oven to 425 degrees F. Mix 4 cups sliced rhubarb (here about 1/4-inch thick), 3 tablespoons tapioca starch, 1/3 cup granulated sugar, a pinch of salt, a pinch of ginger, and the juice of half a lemon. Roll both pie dough halves into 10×15-inch rectangles; keep them firm and cool in the fridge while not using them, especially if they’ve gotten soft or your kitchen is hot. Place first half on a parchment-lined baking sheet. Spoon filling on, leaving a 1.5-inch border. Cut second dough into on the diagonal into strips, whatever width you’d like. Lay every other strip over rhubarb filling in one angled direction. Form a lattice with remaining strips in the opposite direction. Trim strips so that they’re flush with bottom crust area. Fold crust over the lattice top and filling all around the pie, crimping to tighten the seal. Brush with an egg wash (1 egg, beaten lightly with 1 teaspoon water) and sprinkle with coarse or raw sugar. Bake for about 25 minutes, until golden all over. Let cool to warm before cutting into squares.
Related Posts


