I’m an author, food photographer, baker, and blogger. And as of today, I can add Cheesecake Ambassador to my list of professional titles too. ? This chocolate peanut butter cheesecake bars recipe is sponsored by PHILADELPHIA Cream Cheese, whose products I’ve long admired and trusted in my baking. I’m thrilled to show off their quality cream cheese today and, as always, all opinions are 100% my own. (You know I never steer you wrong!)
Today I’m breaking down the barrier to making real cheesecake, showing you that it’s not only delicious, but approachable for all home bakers. A little more special than a batch of cookies and not nearly as overwhelming as a tall layer cake, cheesecake bars are the perfect solution when you need a crowd-pleasing dessert without complicated ingredients.
After testing the recipe, I made them for girls night the other week. I chose this recipe because they’re really easy to prep ahead of time and are extra convenient for serving. No fork needed! Each person literally said these are the best dessert they’ve ever had.
Plus, there’s no need for a water bath. Let me show you how to make them.
I’d obviously never deprive you of chocolate, peanut butter, and cheesecake. The possibilities are endless!!!
.tasty-recipes-image {
float: right; }
.tasty-recipes-yield-scale {
border: 1px solid #979599;
border-radius: 2px;
color: #979599;
margin-left: 3px;
padding: 0 4px;
font-size: 0.7rem; }
.tasty-recipes-scale-container {
float: right;
padding: 0 0 1rem; }
.tasty-recipes-scale-container .tasty-recipes-scale-label {
text-transform: uppercase;
font-size: 0.6rem;
color: #979599; }
.tasty-recipes-scale-container button {
background: transparent;
border: 1px solid #979599;
border-radius: 2px;
color: #979599;
margin-left: 5px;
padding: 2px 4px; }
.tasty-recipes-scale-container button.tasty-recipes-scale-button-active {
color: #353547;
border-color: #353547; }
.tasty-recipes-scale-container button:focus {
outline: none; }
.tasty-recipes-print-button {
background-color: #666677;
display: inline-block;
padding-left: 1em;
padding-right: 1em;
padding-top: 0.5em;
padding-bottom: 0.5em;
text-decoration: none; }
a.tasty-recipes-print-button {
color: #fff; }
a.tasty-recipes-print-button:hover {
color: #fff; }
.tasty-recipes-equipment {
display: -webkit-box;
display: flex;
flex-wrap: wrap;
-webkit-box-pack: space-evenly;
justify-content: space-evenly; }
.tasty-recipes-equipment > h3 {
-webkit-box-flex: 0;
flex: 0 0 100%; }
.tasty-recipes-equipment .tasty-link-card {
-webkit-box-flex: 0;
flex: 0 0 50%;
padding: 1.5rem 1rem;
text-align: center; }
@media screen and (min-width: 500px) {
.tasty-recipes-equipment .tasty-link-card {
-webkit-box-flex: 0;
flex: 0 0 33%; } }
.tasty-recipes-equipment .tasty-link-card p {
font-weight: bold;
font-size: 1em;
margin-bottom: 0; }
.tasty-recipes-equipment .tasty-link-card p a {
color: initial; }
.tasty-recipes-equipment .tasty-link-card span {
font-size: 0.9em; }
.tasty-recipes-rating.tasty-recipes-clip-10 {
-webkit-clip-path: polygon(0 0, 10% 0%, 10% 100%, 0% 100%);
clip-path: polygon(0 0, 10% 0%, 10% 100%, 0% 100%); }
.tasty-recipes-rating.tasty-recipes-clip-20 {
-webkit-clip-path: polygon(0 0, 20% 0%, 20% 100%, 0% 100%);
clip-path: polygon(0 0, 20% 0%, 20% 100%, 0% 100%); }
.tasty-recipes-rating.tasty-recipes-clip-30 {
-webkit-clip-path: polygon(0 0, 30% 0%, 30% 100%, 0% 100%);
clip-path: polygon(0 0, 30% 0%, 30% 100%, 0% 100%); }
.tasty-recipes-rating.tasty-recipes-clip-40 {
-webkit-clip-path: polygon(0 0, 40% 0%, 40% 100%, 0% 100%);
clip-path: polygon(0 0, 40% 0%, 40% 100%, 0% 100%); }
.tasty-recipes-rating.tasty-recipes-clip-50 {
-webkit-clip-path: polygon(0 0, 50% 0%, 50% 100%, 0% 100%);
clip-path: polygon(0 0, 50% 0%, 50% 100%, 0% 100%); }
.tasty-recipes-rating.tasty-recipes-clip-60 {
-webkit-clip-path: polygon(0 0, 60% 0%, 60% 100%, 0% 100%);
clip-path: polygon(0 0, 60% 0%, 60% 100%, 0% 100%); }
.tasty-recipes-rating.tasty-recipes-clip-70 {
-webkit-clip-path: polygon(0 0, 70% 0%, 70% 100%, 0% 100%);
clip-path: polygon(0 0, 70% 0%, 70% 100%, 0% 100%); }
.tasty-recipes-rating.tasty-recipes-clip-80 {
-webkit-clip-path: polygon(0 0, 80% 0%, 80% 100%, 0% 100%);
clip-path: polygon(0 0, 80% 0%, 80% 100%, 0% 100%); }
.tasty-recipes-rating.tasty-recipes-clip-90 {
-webkit-clip-path: polygon(0 0, 90% 0%, 90% 100%, 0% 100%);
clip-path: polygon(0 0, 90% 0%, 90% 100%, 0% 100%); }
.tasty-recipes-nutrition ul {
list-style-type: none;
margin: 0;
padding: 0; }
.tasty-recipes-nutrition ul:after {
display: block;
content: ‘ ‘;
clear: both; }
.tasty-recipes-nutrition li {
float: left;
margin-right: 1em; }
.tasty-recipes-plug {
text-align: center;
margin-bottom: 1em;
display: -webkit-box;
display: flex;
-webkit-box-align: center;
align-items: center;
-webkit-box-pack: center;
justify-content: center; }
.tasty-recipes-plug a {
text-decoration: none;
box-shadow: none; }
.tasty-recipes-plug a img {
width: 150px;
height: auto;
margin: 5px 0 0 8px;
display: inline-block; }
@media print {
.tasty-recipes-no-print,
.tasty-recipes-no-print * {
display: none !important; } }
.tasty-recipes {
margin-bottom: 4em;
max-width: 700px;
background-color: #f9f9f9;
}
.tasty-recipes.tasty-recipes-has-plug {
margin-bottom: 1em;
}
.tasty-recipes-plug {
margin-bottom: 4em;
}
.tasty-recipes-print-button {
display: none;
}
.tasty-recipes-image-shim {
height: 69.5px;
clear: both;
}
.tasty-recipes-entry-header {
background-color: #f9f9f9;
padding-top: 2em;
padding-left: 2em;
padding-right: 2em;
}
.tasty-recipes-entry-header.tasty-recipes-has-image {
padding-top: 0px;
}
.tasty-recipes-entry-header .tasty-recipes-image {
float: none;
margin-bottom: 1em;
}
@media only screen and (min-width: 730px) {
.tasty-recipes-entry-header .tasty-recipes-image {
float: left;
margin-right: 16px;
}
}
.tasty-recipes-entry-header .tasty-recipes-image img {
float: none;
height: 150px;
width: 150px;
}
.tasty-recipes-entry-header .tasty-recipes-header-content {
min-height: 215px;
}
.tasty-recipes-entry-header h2 {
margin-bottom: 0;
margin-top: 0;
padding-top: 0;
padding-bottom: 0;
clear: none;
}
.tasty-recipes-entry-header hr {
border: 1px solid #eee;
background-color: #eee;
margin-bottom: 0;
margin-top: 1em;
margin-right: -2em;
margin-left: -2em;
}
.tasty-recipes-entry-header .tasty-recipes-rating-outer {
width: 100%;
}
.tasty-recipes-entry-header .tasty-recipes-rating-outer a {
text-decoration: none;
border: none;
display: inherit;
box-shadow: none;
}
.tasty-recipes-entry-header .tasty-recipes-rating-outer a:hover {
text-decoration: none;
}
.tasty-recipes-entry-header .tasty-recipes-rating-stars {
font-size: 18px;
}
.tasty-recipes-entry-header .tasty-recipes-rating-stars span {
margin-right: 2px;
margin-left: 2px;
color: #aaaaaa;
}
.tasty-recipes-entry-header .tasty-recipes-rating-stars span:first-child {
margin-left: 0;
}
.tasty-recipes-entry-header .tasty-recipes-rating-label {
color: #B7BBC6;
font-size: .6875em;
margin-top: 1em;
position: absolute;
}
.tasty-recipes-entry-header .tasty-recipes-rating-stars .post-ratings {
font-size: 10px;
}
.tasty-recipes-entry-header .tasty-recipes-rating-stars .post-ratings .tasty-recipes-cf-ratings-label {
margin-top: 0;
line-height: 1;
}
.tasty-recipes-entry-header .tasty-recipes-details {
margin-top: 1.5em;
color: #606060;
}
.tasty-recipes-entry-header .tasty-recipes-details ul {
list-style-type: none;
margin: 0;
padding-left: 0;
}
.tasty-recipes-entry-header .tasty-recipes-details ul li {
display: inline-block;
margin-left: 0;
padding-left: 0;
margin-right: .5em;
margin-bottom: 0;
font-size: 1em;
line-height: 1.8em;
}
.tasty-recipes-entry-header .tasty-recipes-details .detail-icon {
height: 1em;
margin-top: .4em;
}
.tasty-recipes-entry-header .tasty-recipes-details ul li {
font-size: 1em;
}
.tasty-recipes-entry-header .tasty-recipes-details .tasty-recipes-label {
margin-right: .125em;
}
.tasty-recipes-entry-header .tasty-recipes-details .detail-icon {
vertical-align: top;
margin-right: .2em;
}
@media only screen and (min-width: 730px) {
.tasty-recipes-entry-header .tasty-recipes-details {
padding-left: 166px;
}
}
.tasty-recipes-entry-content {
padding-top: 0.1em;
background: #f9f9f9;
color: #606060;
clear: both;
}
.tasty-recipes-entry-header .tasty-recipes-buttons {
margin-top: 1.25em;
margin-bottom: 1.25em;
width: 100%;
}
.tasty-recipes-entry-header .tasty-recipes-buttons:after {
content: ” “;
display: block;
clear: both;
}
.tasty-recipes-entry-header .tasty-recipes-button-wrap {
box-sizing: border-box;
}
.tasty-recipes-entry-header .tasty-recipes-buttons a {
text-transform: uppercase;
text-align: center;
display: block;
background-color: #f9f9f9;
font-size: 1em;
line-height: 1.375em;
font-weight: bold;
padding-top: 7px;
padding-bottom: 7px;
margin-top: 0;
border: 1px solid #aaaaaa;;
border-radius: 0;
text-decoration: none;
color: #aaaaaa;
}
.tasty-recipes-entry-header .tasty-recipes-buttons .button:hover {
background-color: #f9f9f9;
border: 3px solid #aaaaaa;
color: #aaaaaa;
opacity: 1;
}
.tasty-recipes-entry-content a img {
box-shadow: none;
-webkit-box-shadow: none;
}
.tasty-recipes-entry-header .tasty-recipes-buttons a:hover {
background-color: #979599;
text-decoration: none;
}
.tasty-recipes-entry-header .tasty-recipes-buttons img {
vertical-align: top;
}
.tasty-recipes-entry-header .tasty-recipes-buttons img.svg-print,
.tasty-recipes-entry-header .tasty-recipes-buttons img.svg-pinterest {
height: 1.25em;
margin-right: .375em;
margin-bottom: 0;
background: none;
display: inline-block;
box-shadow: none;
}
@media only screen and (max-width: 730px) {
.tasty-recipes-entry-header .tasty-recipes-button-wrap {
width: 100%;
}
.tasty-recipes-entry-header .tasty-recipes-button-wrap:nth-child(2) {
padding-top: 1em;
}
}
@media only screen and (min-width: 450px) {
.tasty-recipes-entry-header .tasty-recipes-buttons {
width: 100%;
float: none;
}
.tasty-recipes-entry-header .tasty-recipes-button-wrap:first-child {
width: 50%;
padding-right: 5px;
float: left;
}
.tasty-recipes-entry-header .tasty-recipes-button-wrap:last-child {
width: 50%;
padding-left: 5px;
float: right;
padding-top: 0;
}
}
@media only screen and (min-width: 730px) {
.tasty-recipes-entry-header .tasty-recipes-buttons {
padding-left: 166px;
box-sizing: border-box;
}
.tasty-recipes-header-content {
position: relative;
}
.tasty-recipes-header-content .tasty-recipes-rating-outer {
position: absolute;
top: 155px;
width: 150px;
text-align: center;
}
.tasty-recipes-header-content .tasty-recipes-rating-label {
display: block;
position: static;
margin-top: 0;
}
}
.tasty-recipes-entry-content h3 {
color: initial;
}
.tasty-recipes-entry-content h4 {
font-size: 1em;
padding-top: 0;
margin-bottom: 1.5em;
margin-top: 1.5em;
}
.tasty-recipes-entry-content hr {
background-color: #eee;
border: 1px solid #eee;
margin-top: 1em;
margin-bottom: 1em;
}
.tasty-recipes-entry-content .tasty-recipes-description,
.tasty-recipes-entry-content .tasty-recipes-ingredients,
.tasty-recipes-entry-content .tasty-recipes-instructions,
.tasty-recipes-entry-content .tasty-recipes-keywords {
padding-left: 2em;
padding-right: 2em;
}
.tasty-recipes-entry-content .tasty-recipes-description p {
margin-bottom: 1em;
}
.tasty-recipes-entry-content .tasty-recipes-ingredients ul,
.tasty-recipes-entry-content .tasty-recipes-instructions ul {
list-style-type: none;
margin-left: 0;
margin-bottom: 1.5em;
padding: 0;
}
.tasty-recipes-entry-content .tasty-recipes-ingredients ul li,
.tasty-recipes-entry-content .tasty-recipes-instructions ul li {
margin-bottom: .625em;
list-style-type: none;
position: relative;
margin-left: 2.5em;
line-height: 1.46;
}
.tasty-recipes-entry-content .tasty-recipes-ingredients ul li:before,
.tasty-recipes-entry-content .tasty-recipes-instructions ul li:before {
background-color: #aaaaaa;
-webkit-border-radius: 50%;
-moz-border-radius: 50%;
border-radius: 50%;
height: .5em;
width: .5em;
display: block;
content: ” “;
left: -1.25em;
top: .375em;
position: absolute;
}
.tasty-recipes-entry-content .tasty-recipes-ingredients ol,
.tasty-recipes-entry-content .tasty-recipes-instructions ol {
counter-reset:li;
margin-left: 0;
padding: 0;
}
.tasty-recipes-entry-content .tasty-recipes-ingredients ol > li,
.tasty-recipes-entry-content .tasty-recipes-instructions ol > li {
list-style-type: none;
position: relative;
margin-bottom: 1em;
margin-left: 2.5em;
line-height: 1.46;
}
.tasty-recipes-entry-content .tasty-recipes-ingredients ol > li:before,
.tasty-recipes-entry-content .tasty-recipes-instructions ol > li:before {
content:counter(li);
counter-increment: li;
position: absolute;
background-color: #aaaaaa;
-webkit-border-radius: 50%;
-moz-border-radius: 50%;
border-radius: 50%;
height: 1.45em;
width: 1.45em;
color: #FFF;
left: -1.25em;
transform: translateX(-50%);
line-height: 1.5em;
font-size: .6875em;
text-align: center;
top: .1875em;
}
.tasty-recipes-entry-content .tasty-recipes-ingredients li li,
.tasty-recipes-entry-content .tasty-recipes-instructions li li {
margin-top: 0.625em;
}
.tasty-recipes-entry-content .tasty-recipes-ingredients li ul,
.tasty-recipes-entry-content .tasty-recipes-ingredients li ol,
.tasty-recipes-entry-content .tasty-recipes-instructions li ul,
.tasty-recipes-entry-content .tasty-recipes-instructions li ol {
margin-bottom: 0;
}
@media only screen and (max-width: 520px) {
.tasty-recipes-entry-content .tasty-recipes-ingredients ol,
.tasty-recipes-entry-content .tasty-recipes-instructions ol {
margin-left: 0;
}
}
.tasty-recipes-entry-content .tasty-recipes-equipment {
padding-left: 2em;
padding-right: 2em;
}
.tasty-recipes-entry-content .tasty-recipe-video-embed ~ .tasty-recipes-equipment {
padding-top: 1em;
}
.tasty-recipes-entry-content .tasty-recipes-notes,
.tasty-recipes-entry-content .tasty-recipes-nutrition {
padding-bottom: 1.25em;
padding-left: 2em;
padding-right: 2em;
}
.tasty-recipes-entry-content .tasty-recipes-notes ol {
counter-reset:li;
margin-left: 0;
padding: 0;
margin-bottom: 0;
}
.tasty-recipes-entry-content .tasty-recipes-notes ul {
margin-left: 0;
padding: 0;
margin-bottom: 0;
}
.tasty-recipes-entry-content .tasty-recipes-notes p,
.tasty-recipes-entry-content .tasty-recipes-notes ul li,
.tasty-recipes-entry-content .tasty-recipes-notes ol li {
padding-left: 1.5625em;
padding-right: 1.5625em;
padding-top: 1.25em;
padding-bottom: 1.25em;
position: relative;
margin-bottom: 1.5em;
list-style-type: none;
}
.tasty-recipes-entry-content .tasty-recipes-notes p,
.tasty-recipes-entry-content .tasty-recipes-notes ul li,
.tasty-recipes-entry-content .tasty-recipes-notes ol li {
padding-left: 2.5em;
margin-left: 0;
margin-bottom: 0;
}
.tasty-recipes-entry-content .tasty-recipes-notes p:before,
.tasty-recipes-entry-content .tasty-recipes-notes ul li:before {
content: “i”;
display: block;
background-color: #aaaaaa;
-webkit-border-radius: 50%;
-moz-border-radius: 50%;
border-radius: 50%;
height: 1.3em;
width: 1.3em;
font-size: .75em;
line-height: 1.3em;
text-align: center;
color: #FFF;
position: absolute;
left: 1.167em;
top: 2.1em;
}
.tasty-recipes-entry-content .tasty-recipes-notes ol > li:before {
content:counter(li);
counter-increment: li;
position: absolute;
background-color: #aaaaaa;
-webkit-border-radius: 50%;
-moz-border-radius: 50%;
border-radius: 50%;
height: 1.45em;
width: 1.45em;
color: #FFF;
left: 2em;
transform: translateX(-50%);
line-height: 1.5em;
font-size: .6875em;
text-align: center;
top: 2.3em;
}
.tasty-recipes-entry-content .tasty-recipes-notes p:last-child {
margin-bottom: 0;
}
.tasty-recipes-entry-content .tasty-recipes-keywords {
margin-top: 1em;
margin-bottom: 1em;
color: #aaaaaa;
}
.tasty-recipes-entry-content .tasty-recipes-keywords p {
margin-bottom: 0;
font-size: 0.7em;
}
.tasty-recipes-nutrifox {
text-align: center;
margin: 0;
}
.tasty-recipes-nutrifox iframe {
width: 100%;
display: block;
margin: 0;
}
.tasty-recipes-entry-content .tasty-recipes-nutrition ul li {
float: none;
line-height: 2em;
list-style-type: none;
margin-left: 0;
padding-left: 0.833em;
}
.tasty-recipes-entry-footer {
background-color: #fff;
padding-top: 1.5625em;
padding-bottom: 1.25em;
padding-left: 2.5em;
padding-right: 2.5em;
text-align: center;
}
.tasty-recipes-entry-footer .tasty-recipes-footer-content {
display: inline-block;
}
.tasty-recipes-entry-footer img {
width: 65px;
}
.tasty-recipes-entry-footer h3 {
font-size: 1.25em;
line-height: 2.25em;
margin-top: .5em;
margin-bottom: .125em;
padding: 0;
line-height: 1em;
}
.tasty-recipes-entry-footer p {
margin-bottom: 0;
font-size: .75em;
}
.tasty-recipes-entry-footer p a {
text-decoration: underline;
box-shadow: none;
border-bottom: none;
}
.tasty-recipes-entry-footer:after {
content: ” “;
display: block;
clear:both;
}
@media only screen and (max-width: 520px) {
.tasty-recipes-entry-footer h3 {
margin-top: .5em;
margin-bottom: .5em;
}
.tasty-recipes-entry-footer {
text-align: center;
}
}
@media only screen and (min-width: 520px) {
.tasty-recipes-entry-footer img {
float: left;
}
.tasty-recipes-entry-footer h3,
.tasty-recipes-entry-footer p {
margin-left: 90px;
clear: none;
text-align: left;
}
}
.clearfix:after {
clear: both;
content: ” “;
display: table;
}
/* Print view styles */
.tasty-recipes-print-view {
font-size: 11px;
}
.tasty-recipes-print-view .tasty-recipes-print-button {
display: inline-block;
}
.tasty-recipes-print {
padding:0;
}
.tasty-recipes-print-view .tasty-recipes,
.tasty-recipes-print-view .tasty-recipes-entry-content {
background: #fff;
}
.tasty-recipes-print-view .tasty-recipes {
margin-top: 1em;
}
.tasty-recipes-print .tasty-recipes-entry-header {
background-color: inherit;
color: inherit;
padding-bottom: 0;
padding-left: 1em;
padding-right: 1em;
}
.tasty-recipes-print .tasty-recipes-entry-header .tasty-recipes-image {
transform: none;
float: left;
margin-right: 16px;
}
.tasty-recipes-print-view .tasty-recipes-entry-header .tasty-recipes-header-content {
min-height: 150px;
}
.tasty-recipes-print.tasty-recipes-has-image .tasty-recipes-entry-header h2 {
margin-top: 0;
}
.tasty-recipes-print .tasty-recipes-entry-header h2 {
color: inherit;
margin-bottom: .5em;
}
.tasty-recipes-print .tasty-recipes-entry-header hr {
display: none;
}
.tasty-recipes-print .tasty-recipes-header-content .tasty-recipes-rating-outer {
position: initial;
text-align: left;
width: unset;
top: unset;
}
.tasty-recipes-print .tasty-recipes-entry-header .tasty-recipes-rating-stars span {
color: #000;
}
.tasty-recipes-print .tasty-recipes-entry-header .tasty-recipes-details ul {
padding: 0;
clear: none;
}
.tasty-recipes-print .tasty-recipes-entry-header .tasty-recipes-details ul li {
line-height: 1.8em;
margin-bottom: 0;
}
.tasty-recipes-print .tasty-recipes-entry-header .tasty-recipes-details .detail-icon {
display: none;
}
.tasty-recipes-print-view .tasty-recipes-source-link {
text-align: center;
}
.tasty-recipes-print-view .tasty-recipes-entry-content .tasty-recipes-ingredients ul li,
.tasty-recipes-print-view .tasty-recipes-entry-content .tasty-recipes-instructions ul li,
.tasty-recipes-print-view .tasty-recipes-entry-content .tasty-recipes-ingredients ol li,
.tasty-recipes-print-view .tasty-recipes-entry-content .tasty-recipes-instructions ol li {
margin-bottom: 0;
}
.tasty-recipes-print-view .tasty-recipes-entry-content .tasty-recipes-notes p,
.tasty-recipes-print-view .tasty-recipes-entry-content .tasty-recipes-notes ul li,
.tasty-recipes-print-view .tasty-recipes-entry-content .tasty-recipes-notes ol li {
margin-top: 1rem;
padding-top: 0;
padding-bottom: 0;
}
.tasty-recipes-print-view .tasty-recipes-entry-content .tasty-recipes-notes p:before,
.tasty-recipes-print-view .tasty-recipes-entry-content .tasty-recipes-notes ul li:before {
top: 0.1em;
}
Description
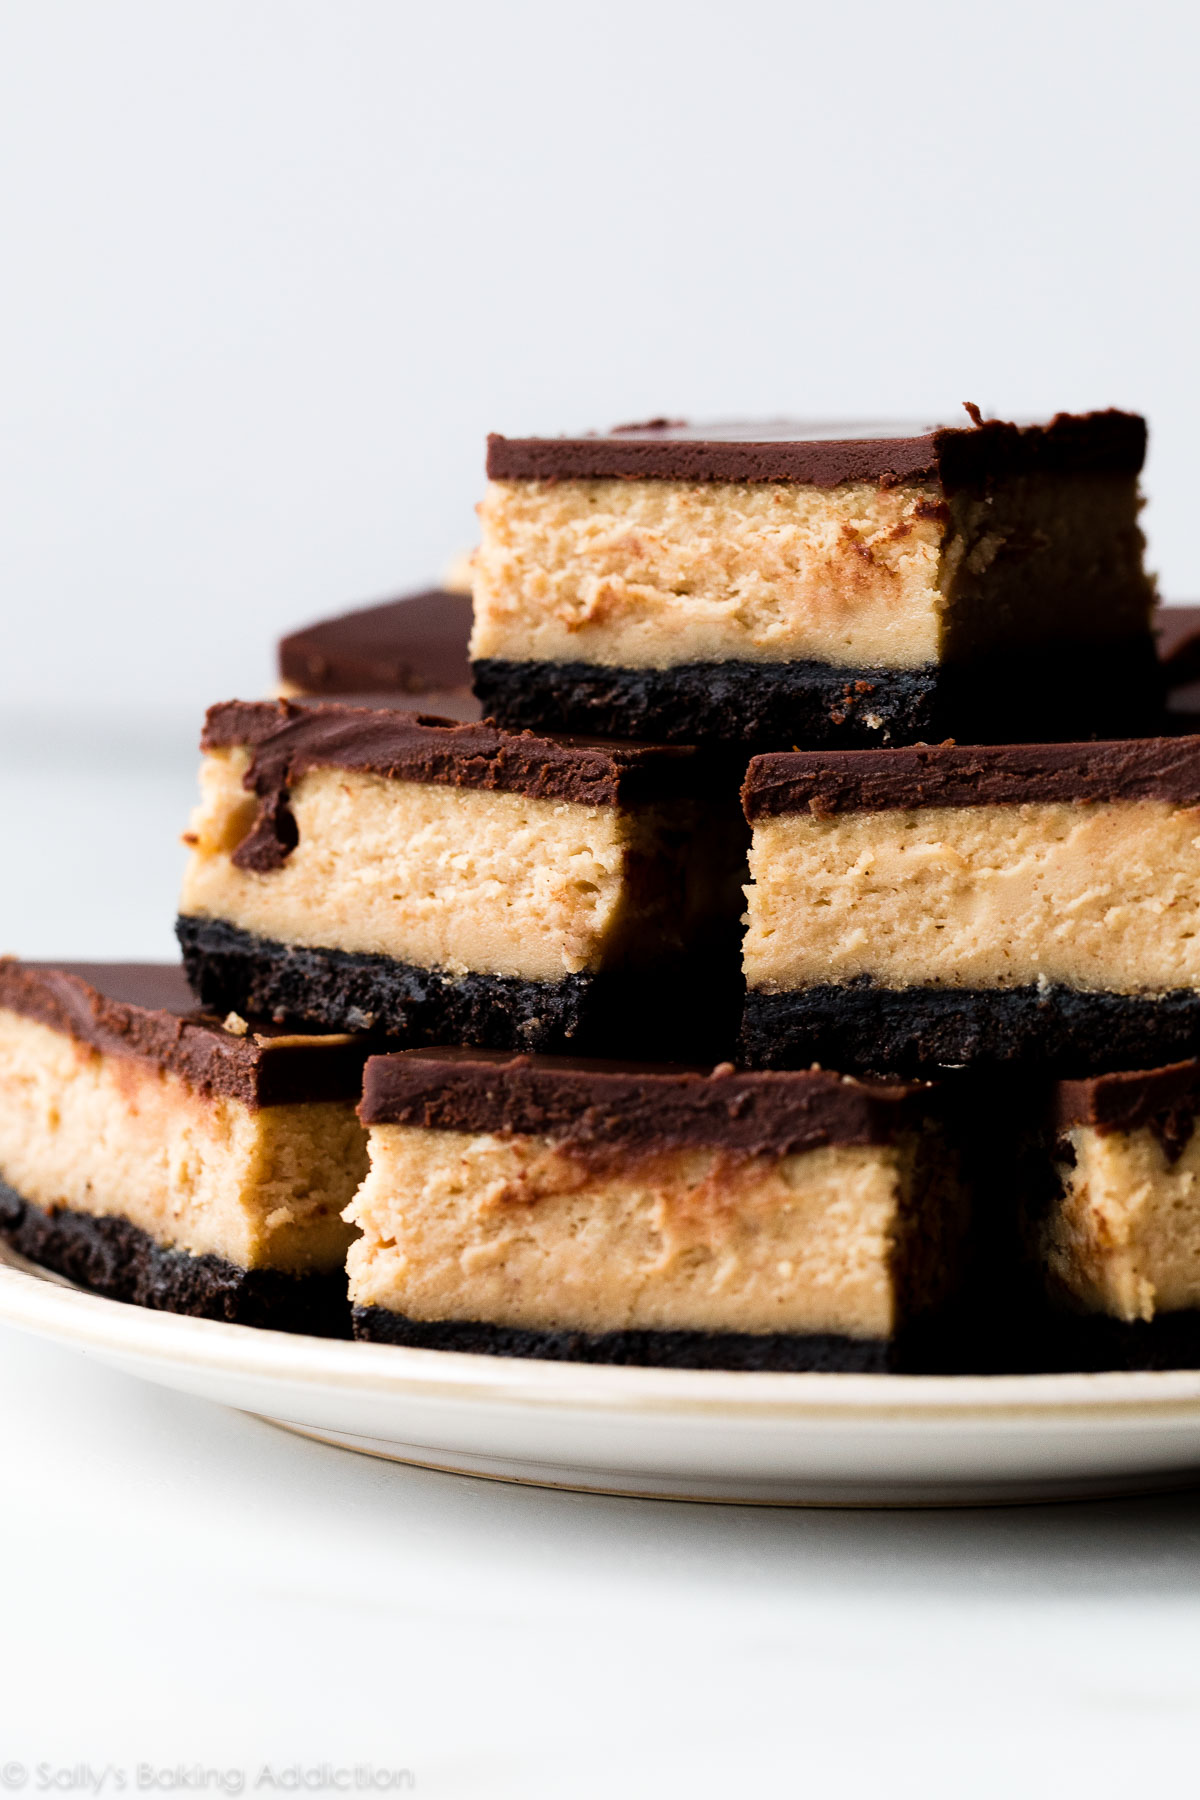
Quicker to bake and chill than a full cheesecake, these chocolate peanut butter cheesecake bars are the perfect choice when you need a crowd-pleasing dessert that’s also portable, easy to serve, and handheld. For best results, follow the recipe as written including sufficiently cooling and chilling the bars.
Ingredients
Crust
- 36 cream-filled chocolate sandwich cookies (regular or double filled)
- 1/2 cup (1 stick; 115g) unsalted butter, melted
Peanut Butter Filling
- three 8-ounce bricks (24 oz) full-fat PHILADELPHIA Cream Cheese, softened to room temperature
- 1 cup (200g) granulated sugar
- 1/4 cup (60g) sour cream or plain yogurt, at room temperature
- 1 cup (250g) creamy peanut butter (not natural style)
- 1 teaspoon pure vanilla extract
- 1/8 teaspoon salt
- 3 large eggs, at room temperature
Chocolate Topping
- 1/2 cup (1 stick; 115g) unsalted butter
- 1 heaping cup (around 200g) semi-sweet chocolate chips
Instructions
- Preheat oven to 350°F (177°C). Line the bottom and sides of a 9×13 inch baking pan with parchment paper, leaving an overhang on the sides to lift the finished bars out (makes cutting easier!). Set aside.
- For the Crust: In a food processor or blender, pulse the whole sandwich cookie (cookie AND cream filling) into a fine crumb. You should have about 3 cups of crumbs. Stir the cookie crumbs and melted butter together in a large bowl. Press tightly into the bottom of the lined baking pan. Pre-bake for 10 minutes. Remove from the oven and set aside. Leave oven on.
- For the peanut butter cheesecake filling: Using a handheld or stand mixer fitted with a paddle attachment, beat the cream cheese and granulated sugar together on medium-high speed in a large bowl until the mixture is smooth and creamy, about 2 minutes. Add the sour cream and beat until fully combined. Then add the peanut butter, vanilla extract, and salt and beat until fully combined. On medium speed, add the eggs one at a time, beating after each addition until just blended. After the 3rd egg is incorporated into the batter, stop mixing. A few small lumps can remain. Whisk the filling a few times by hand to rid any large lumps at the bottom of the bowl.
- Pour the cheesecake filling onto the crust. It’s ok if the crust is still warm. Spread evenly on top with a rubber spatula or back of a spoon. (It will seem like a thick layer of cheesecake filling; that’s ok.)
- Bake for 35-38 minutes or until the cheesecake appears set on top and the edges are browned. The edges may slightly crack. (Mine do!) The bars will be puffy, but will sink slightly down as they cool. Place pan on a wire rack. Cool for 1 hour at room temperature, then chill in the refrigerator for at least 3-4 hours (and up to 1 day) before topping with chocolate. If you’re in a rush, place in the freezer for 2 hours (or until chilled throughout.) If you plan to chill the bars for longer than a few hours, loosely cover with aluminum foil after 3-4 hours of chilling.
- For the chocolate topping: Cut the butter into Tablespoon size pieces. Place into a heat-proof bowl. Pour chocolate chips on top. Place in the microwave and melt in 30 second increments until smooth, stopping and stirring after each. You can also melt together on the stove, stirring constantly until smooth. Let the mixture cool for 2-3 minutes, then pour and spread evenly over chilled cheesecake bars. The cheesecake bars usually have a lip around the border since the center slightly sinks down, so it’s easy to spread the chocolate topping, stopping around the border/lip. If yours don’t have a raised lip around the edges, don’t worry and just spread the filling evenly all over the top.
- Chill in the refrigerator for 45-60 minutes or in the freezer for 30 minutes until the chocolate topping has set. If chilling for longer than 1 hour, loosely cover with aluminum foil after 1 hour of chilling. Chocolate topping must be completely set and solid on top of the cheesecake bars before slicing.
- To slice, lift the bars out of the pan as a whole using the parchment overhang on the sides. Cut into squares with a sharp knife. For extra neat squares, wipe the knife clean between each cut.
- Cover and store leftover cheesecake bars in the refrigerator for up to 1 week.
Notes
- Make-Ahead & Freezing Instructions: Prepare recipe through step 4 up to 2 days in advance. Cover unbaked cheesecake bars and store in the refrigerator until ready to bake. Continue with step 5. Since they’re cold, bars will take a few extra minutes to bake. To freeze– cool, chill, and slice bars as instructed. Freeze bars between layers of parchment paper for up to 3 months. Thaw overnight in the refrigerator before serving.
- Chocolate Cookie Crust: You need 36 whole cream-filled chocolate sandwich cookies, which pulse down into about 3 cups of crumbs. If desired, you can substitute 3 cups of graham cracker crumbs, which is about 22-24 full-sheet graham crackers.
- Peanut Butter: Natural style peanut butter isn’t ideal for peanut butter cheesecake. The filling will be too dry, crumbly, and/or won’t set up properly. I do not recommend crunchy style peanut butter for that same reason. It’s too thick.
- Smaller Pan or Full Cheesecake: For an 8-inch square pan (9-inch is too big), follow the recipe as instructed, but halve the crust, filling, and topping. For the filling, use 1 egg + 1 egg yolk. Bake time is closer to 30 minutes. For a full cheesecake in a 9-inch springform pan, use the filling recipe as written. Halve the crust recipe (use 18 cookies and 1/4 cup (60g) butter) and chocolate topping recipe (1/4 cup (60g) butter and 1/2 cup (90g) chocolate chips). I recommend following the baking and cooling instructions, including using a water bath, as found in my regular cheesecake recipe. After the cheesecake has chilled completely, top with chocolate topping then chill for at least 45-60 minutes as instructed in this recipe (step 7) before slicing and serving.
- Mini Individual Cheesecakes: Use the baking and cooling instructions found in my mini cheesecakes and use this recipe as written. Recipe makes about 4 dozen cheesecakes in a muffin pan. Line 12-count muffin pans with liners. Firmly press 1.5 Tablespoons of crust mixture into each. Pre-bake for 5 minutes. Pour filling on top, about 1 Tbsp filling for each. Again, use the baking and cooling instructions found in my mini cheesecakes. Once chilled, top each with chocolate topping then chill in the refrigerator to set it before serving.
Keywords: peanut butter, chocolate, cheesecake, bars