It’s no secret that childhood classics are some of the best foods. Who else enjoyed gushers, push-up pops, fruit-by-the-foot, dunkaroos, those cracker “sticks” and spreadable cheese (lol those were so good), juice boxes, bagel bites, and dinosaur chicken fingers?
This cake roll required more testing than usual because I was SO torn between using butter vs oil, cocoa powder vs melted chocolate, as well as the perfect amount of flour. I’m not kidding… I must have made at least 8 or 9 different chocolate cake rolls. (I lost count after #3!) Despite all the mediocre cakes filling up my brain (and freezer), the recipe testing process was incredibly enlightening. I learned that it’s a VERY thin line between rubbery chocolate sponge cake and good chocolate sponge cake. A line so thin that tightrope walkers would be nervous. Luckily I made all the mistakes so you don’t have to!
Ok, let’s see it some together in a video tutorial.
You can also make mini chocolate cake rolls which are closer in size to the Hostess or Little Debbie snacks we love. Regardless of the brand, a homemade mini or giant version is just as tasty as you remember. But as a bonus, it’s completely fresh from your own kitchen!
A little of this, a little of that. These basic ingredients wear very important hats in this Swiss roll cake recipe. Unless where noted, avoid making substitutions.
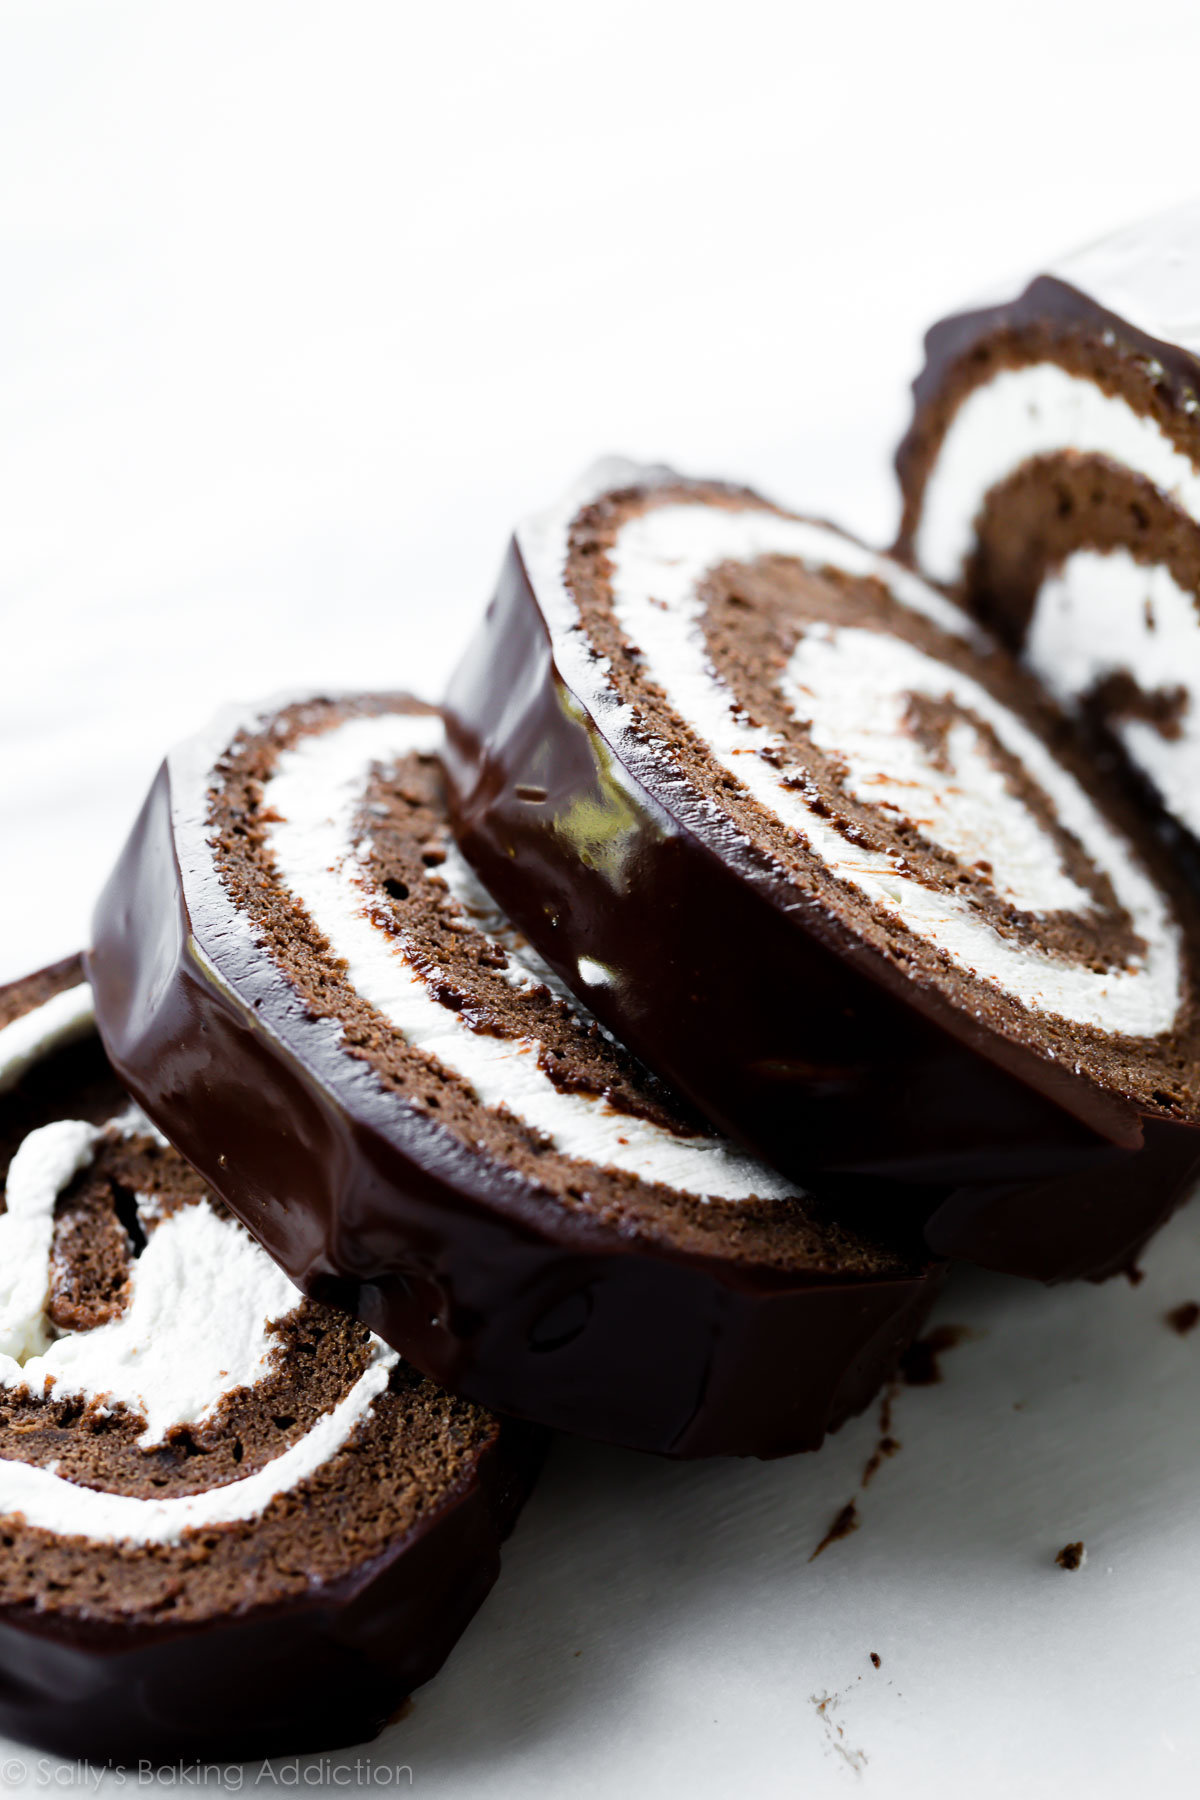
The cake cools in the rolled up shape. It can cool at room temperature or in the refrigerator. I usually cool cake rolls in the refrigerator for about 2-3 hours. Once completely cool, unroll the chocolate cake and fill with homemade whipped cream. You only need 3 ingredients: heavy cream, sugar, and vanilla extract. Since the chocolate ganache is pretty dark, I use a bit more sugar and vanilla extract compared to my usual whipped cream recipe. You can use confectioners’ sugar or granulated sugar in the whipped cream– see my recipe note. You can even add some store-bought marshmallow creme (“fluff”) for marshmallow flavor.
The whipped cream is billowy and soft with deliciously sweet vanilla flavor– a lovely and light contrast to the deep chocolate cake!
Roll the cake back up (without parchment this time), then set it aside as you prepare the chocolate ganache.
The only thing easer than homemade whipped cream is homemade chocolate ganache. Simply combine warm cream with finely chopped chocolate, then mix the two together until completely smooth. I like to add a teaspoon of corn syrup for an extra glossy finish, but that’s totally optional.
Drape it all over the chocolate cake roll. Chill the cake roll so the chocolate ganache sets, which makes slicing a bit neater. (Though there’s still plenty of lick-your-finger moments!)
.tasty-recipes-image {
float: right; }
.tasty-recipes-yield-scale {
border: 1px solid #979599;
border-radius: 2px;
color: #979599;
margin-left: 3px;
padding: 0 4px;
font-size: 0.7rem; }
.tasty-recipes-scale-container {
float: right;
padding: 0 0 1rem; }
.tasty-recipes-scale-container .tasty-recipes-scale-label {
text-transform: uppercase;
font-size: 0.6rem;
color: #979599; }
.tasty-recipes-scale-container button {
background: transparent;
border: 1px solid #979599;
border-radius: 2px;
color: #979599;
margin-left: 5px;
padding: 2px 4px; }
.tasty-recipes-scale-container button.tasty-recipes-scale-button-active {
color: #353547;
border-color: #353547; }
.tasty-recipes-scale-container button:focus {
outline: none; }
.tasty-recipes-print-button {
background-color: #666677;
display: inline-block;
padding-left: 1em;
padding-right: 1em;
padding-top: 0.5em;
padding-bottom: 0.5em;
text-decoration: none; }
a.tasty-recipes-print-button {
color: #fff; }
a.tasty-recipes-print-button:hover {
color: #fff; }
.tasty-recipes-rating.tasty-recipes-clip-10 {
-webkit-clip-path: polygon(0 0, 10% 0%, 10% 100%, 0% 100%);
clip-path: polygon(0 0, 10% 0%, 10% 100%, 0% 100%); }
.tasty-recipes-rating.tasty-recipes-clip-20 {
-webkit-clip-path: polygon(0 0, 20% 0%, 20% 100%, 0% 100%);
clip-path: polygon(0 0, 20% 0%, 20% 100%, 0% 100%); }
.tasty-recipes-rating.tasty-recipes-clip-30 {
-webkit-clip-path: polygon(0 0, 30% 0%, 30% 100%, 0% 100%);
clip-path: polygon(0 0, 30% 0%, 30% 100%, 0% 100%); }
.tasty-recipes-rating.tasty-recipes-clip-40 {
-webkit-clip-path: polygon(0 0, 40% 0%, 40% 100%, 0% 100%);
clip-path: polygon(0 0, 40% 0%, 40% 100%, 0% 100%); }
.tasty-recipes-rating.tasty-recipes-clip-50 {
-webkit-clip-path: polygon(0 0, 50% 0%, 50% 100%, 0% 100%);
clip-path: polygon(0 0, 50% 0%, 50% 100%, 0% 100%); }
.tasty-recipes-rating.tasty-recipes-clip-60 {
-webkit-clip-path: polygon(0 0, 60% 0%, 60% 100%, 0% 100%);
clip-path: polygon(0 0, 60% 0%, 60% 100%, 0% 100%); }
.tasty-recipes-rating.tasty-recipes-clip-70 {
-webkit-clip-path: polygon(0 0, 70% 0%, 70% 100%, 0% 100%);
clip-path: polygon(0 0, 70% 0%, 70% 100%, 0% 100%); }
.tasty-recipes-rating.tasty-recipes-clip-80 {
-webkit-clip-path: polygon(0 0, 80% 0%, 80% 100%, 0% 100%);
clip-path: polygon(0 0, 80% 0%, 80% 100%, 0% 100%); }
.tasty-recipes-rating.tasty-recipes-clip-90 {
-webkit-clip-path: polygon(0 0, 90% 0%, 90% 100%, 0% 100%);
clip-path: polygon(0 0, 90% 0%, 90% 100%, 0% 100%); }
.tasty-recipes-nutrition ul {
list-style-type: none;
margin: 0;
padding: 0; }
.tasty-recipes-nutrition ul:after {
display: block;
content: ‘ ‘;
clear: both; }
.tasty-recipes-nutrition li {
float: left;
margin-right: 1em; }
.tasty-recipes-plug {
text-align: center;
margin-bottom: 1em;
display: flex;
align-items: center;
justify-content: center; }
.tasty-recipes-plug a {
text-decoration: none;
box-shadow: none; }
.tasty-recipes-plug a img {
width: 150px;
height: auto;
margin: 5px 0 0 8px;
display: inline-block; }
@media print {
.tasty-recipes-no-print,
.tasty-recipes-no-print * {
display: none !important; } }
.tasty-recipes {
margin-bottom: 4em;
max-width: 700px;
background-color: #f9f9f9;
}
.tasty-recipes.tasty-recipes-has-plug {
margin-bottom: 1em;
}
.tasty-recipes-plug {
margin-bottom: 4em;
}
.tasty-recipes-print-button {
display: none;
}
.tasty-recipes-image-shim {
height: 69.5px;
clear: both;
}
.tasty-recipes-entry-header {
background-color: #f9f9f9;
padding-top: 2em;
padding-left: 2em;
padding-right: 2em;
}
.tasty-recipes-entry-header.tasty-recipes-has-image {
padding-top: 0px;
}
.tasty-recipes-entry-header .tasty-recipes-image {
float: none;
margin-bottom: 1em;
}
@media only screen and (min-width: 730px) {
.tasty-recipes-entry-header .tasty-recipes-image {
float: left;
margin-right: 16px;
}
}
.tasty-recipes-entry-header .tasty-recipes-image img {
float: none;
height: 150px;
width: 150px;
}
.tasty-recipes-entry-header .tasty-recipes-header-content {
min-height: 215px;
}
.tasty-recipes-entry-header h2 {
margin-bottom: 0;
margin-top: 0;
padding-top: 0;
padding-bottom: 0;
clear: none;
}
.tasty-recipes-entry-header hr {
border: 1px solid #eee;
background-color: #eee;
margin-bottom: 0;
margin-top: 1em;
margin-right: -2em;
margin-left: -2em;
}
.tasty-recipes-entry-header .tasty-recipes-rating-outer {
width: 100%;
}
.tasty-recipes-entry-header .tasty-recipes-rating-outer a {
text-decoration: none;
border: none;
display: inherit;
box-shadow: none;
}
.tasty-recipes-entry-header .tasty-recipes-rating-outer a:hover {
text-decoration: none;
}
.tasty-recipes-entry-header .tasty-recipes-rating-stars {
font-size: 18px;
}
.tasty-recipes-entry-header .tasty-recipes-rating-stars span {
margin-right: 2px;
margin-left: 2px;
color: #aaaaaa;
}
.tasty-recipes-entry-header .tasty-recipes-rating-stars span:first-child {
margin-left: 0;
}
.tasty-recipes-entry-header .tasty-recipes-rating-label {
color: #B7BBC6;
font-size: .6875em;
margin-top: 1em;
position: absolute;
}
.tasty-recipes-entry-header .tasty-recipes-rating-stars .post-ratings {
font-size: 10px;
}
.tasty-recipes-entry-header .tasty-recipes-rating-stars .post-ratings .tasty-recipes-cf-ratings-label {
margin-top: 0;
line-height: 1;
}
.tasty-recipes-entry-header .tasty-recipes-details {
margin-top: 1.5em;
color: #606060;
}
.tasty-recipes-entry-header .tasty-recipes-details ul {
list-style-type: none;
margin: 0;
padding-left: 0;
}
.tasty-recipes-entry-header .tasty-recipes-details ul li {
display: inline-block;
margin-left: 0;
padding-left: 0;
margin-right: .5em;
margin-bottom: 0;
font-size: 1em;
line-height: 1.8em;
}
.tasty-recipes-entry-header .tasty-recipes-details .detail-icon {
height: 1em;
margin-top: .4em;
}
.tasty-recipes-entry-header .tasty-recipes-details ul li {
font-size: 1em;
}
.tasty-recipes-entry-header .tasty-recipes-details .tasty-recipes-label {
margin-right: .125em;
}
.tasty-recipes-entry-header .tasty-recipes-details .detail-icon {
vertical-align: top;
margin-right: .2em;
}
@media only screen and (min-width: 730px) {
.tasty-recipes-entry-header .tasty-recipes-details {
padding-left: 166px;
}
}
.tasty-recipes-entry-content {
padding-top: 0.1em;
background: #f9f9f9;
color: #606060;
clear: both;
}
.tasty-recipes-entry-header .tasty-recipes-buttons {
margin-top: 1.25em;
margin-bottom: 1.25em;
width: 100%;
}
.tasty-recipes-entry-header .tasty-recipes-buttons:after {
content: ” “;
display: block;
clear: both;
}
.tasty-recipes-entry-header .tasty-recipes-button-wrap {
box-sizing: border-box;
}
.tasty-recipes-entry-header .tasty-recipes-buttons a {
text-transform: uppercase;
text-align: center;
display: block;
background-color: #f9f9f9;
font-size: 1em;
line-height: 1.375em;
font-weight: bold;
padding-top: 7px;
padding-bottom: 7px;
margin-top: 0;
border: 1px solid #aaaaaa;;
border-radius: 0;
text-decoration: none;
color: #aaaaaa;
}
.tasty-recipes-entry-header .tasty-recipes-buttons .button:hover {
background-color: #f9f9f9;
border: 3px solid #aaaaaa;
color: #aaaaaa;
opacity: 1;
}
.tasty-recipes-entry-content a img {
box-shadow: none;
-webkit-box-shadow: none;
}
.tasty-recipes-entry-header .tasty-recipes-buttons a:hover {
background-color: #979599;
text-decoration: none;
}
.tasty-recipes-entry-header .tasty-recipes-buttons img {
vertical-align: top;
}
.tasty-recipes-entry-header .tasty-recipes-buttons img.svg-print,
.tasty-recipes-entry-header .tasty-recipes-buttons img.svg-pinterest {
height: 1.25em;
margin-right: .375em;
margin-bottom: 0;
background: none;
display: inline-block;
box-shadow: none;
}
@media only screen and (max-width: 730px) {
.tasty-recipes-entry-header .tasty-recipes-button-wrap {
width: 100%;
}
.tasty-recipes-entry-header .tasty-recipes-button-wrap:nth-child(2) {
padding-top: 1em;
}
}
@media only screen and (min-width: 450px) {
.tasty-recipes-entry-header .tasty-recipes-buttons {
width: 100%;
float: none;
}
.tasty-recipes-entry-header .tasty-recipes-button-wrap:first-child {
width: 50%;
padding-right: 5px;
float: left;
}
.tasty-recipes-entry-header .tasty-recipes-button-wrap:last-child {
width: 50%;
padding-left: 5px;
float: right;
padding-top: 0;
}
}
@media only screen and (min-width: 730px) {
.tasty-recipes-entry-header .tasty-recipes-buttons {
padding-left: 166px;
box-sizing: border-box;
}
.tasty-recipes-header-content {
position: relative;
}
.tasty-recipes-header-content .tasty-recipes-rating-outer {
position: absolute;
top: 155px;
width: 150px;
text-align: center;
}
.tasty-recipes-header-content .tasty-recipes-rating-label {
display: block;
position: static;
margin-top: 0;
}
}
.tasty-recipes-entry-content h3 {
color: initial;
}
.tasty-recipes-entry-content h4 {
font-size: 1em;
padding-top: 0;
margin-bottom: 1.5em;
margin-top: 1.5em;
}
.tasty-recipes-entry-content hr {
background-color: #eee;
border: 1px solid #eee;
margin-top: 1em;
margin-bottom: 1em;
}
.tasty-recipes-entry-content .tasty-recipes-description,
.tasty-recipes-entry-content .tasty-recipes-ingredients,
.tasty-recipes-entry-content .tasty-recipes-instructions,
.tasty-recipes-entry-content .tasty-recipes-keywords {
padding-left: 2em;
padding-right: 2em;
}
.tasty-recipes-entry-content .tasty-recipes-description p {
margin-bottom: 1em;
}
.tasty-recipes-entry-content .tasty-recipes-ingredients ul,
.tasty-recipes-entry-content .tasty-recipes-instructions ul {
list-style-type: none;
margin-left: 0;
margin-bottom: 1.5em;
padding: 0;
}
.tasty-recipes-entry-content .tasty-recipes-ingredients ul li,
.tasty-recipes-entry-content .tasty-recipes-instructions ul li {
margin-bottom: .625em;
list-style-type: none;
position: relative;
margin-left: 2.5em;
line-height: 1.46;
}
.tasty-recipes-entry-content .tasty-recipes-ingredients ul li:before,
.tasty-recipes-entry-content .tasty-recipes-instructions ul li:before {
background-color: #aaaaaa;
-webkit-border-radius: 50%;
-moz-border-radius: 50%;
border-radius: 50%;
height: .5em;
width: .5em;
display: block;
content: ” “;
left: -1.25em;
top: .375em;
position: absolute;
}
.tasty-recipes-entry-content .tasty-recipes-ingredients ol,
.tasty-recipes-entry-content .tasty-recipes-instructions ol {
counter-reset:li;
margin-left: 0;
padding: 0;
}
.tasty-recipes-entry-content .tasty-recipes-ingredients ol li,
.tasty-recipes-entry-content .tasty-recipes-instructions ol li {
list-style-type: none;
position: relative;
margin-bottom: 1em;
margin-left: 2.5em;
line-height: 1.46;
}
.tasty-recipes-entry-content .tasty-recipes-ingredients ol li:before,
.tasty-recipes-entry-content .tasty-recipes-instructions ol li:before {
content:counter(li);
counter-increment: li;
position: absolute;
background-color: #aaaaaa;
-webkit-border-radius: 50%;
-moz-border-radius: 50%;
border-radius: 50%;
height: 1.45em;
width: 1.45em;
color: #FFF;
left: -1.25em;
transform: translateX(-50%);
line-height: 1.5em;
font-size: .6875em;
text-align: center;
top: .1875em;
}
@media only screen and (max-width: 520px) {
.tasty-recipes-entry-content .tasty-recipes-ingredients ol,
.tasty-recipes-entry-content .tasty-recipes-instructions ol {
margin-left: 0;
}
}
.tasty-recipes-entry-content .tasty-recipes-notes,
.tasty-recipes-entry-content .tasty-recipes-nutrition {
padding-bottom: 1.25em;
padding-left: 2em;
padding-right: 2em;
}
.tasty-recipes-entry-content .tasty-recipes-notes ol {
counter-reset:li;
margin-left: 0;
padding: 0;
margin-bottom: 0;
}
.tasty-recipes-entry-content .tasty-recipes-notes ul {
margin-left: 0;
padding: 0;
margin-bottom: 0;
}
.tasty-recipes-entry-content .tasty-recipes-notes p,
.tasty-recipes-entry-content .tasty-recipes-notes ul li,
.tasty-recipes-entry-content .tasty-recipes-notes ol li {
padding-left: 1.5625em;
padding-right: 1.5625em;
padding-top: 1.25em;
padding-bottom: 1.25em;
position: relative;
margin-bottom: 1.5em;
list-style-type: none;
}
.tasty-recipes-entry-content .tasty-recipes-notes p,
.tasty-recipes-entry-content .tasty-recipes-notes ul li,
.tasty-recipes-entry-content .tasty-recipes-notes ol li {
padding-left: 2.5em;
margin-left: 0;
margin-bottom: 0;
}
.tasty-recipes-entry-content .tasty-recipes-notes p:before,
.tasty-recipes-entry-content .tasty-recipes-notes ul li:before {
content: “i”;
display: block;
background-color: #aaaaaa;
-webkit-border-radius: 50%;
-moz-border-radius: 50%;
border-radius: 50%;
height: 1.3em;
width: 1.3em;
font-size: .75em;
line-height: 1.3em;
text-align: center;
color: #FFF;
position: absolute;
left: 1.167em;
top: 2.1em;
}
.tasty-recipes-entry-content .tasty-recipes-notes ol li:before {
content:counter(li);
counter-increment: li;
position: absolute;
background-color: #aaaaaa;
-webkit-border-radius: 50%;
-moz-border-radius: 50%;
border-radius: 50%;
height: 1.45em;
width: 1.45em;
color: #FFF;
left: 2em;
transform: translateX(-50%);
line-height: 1.5em;
font-size: .6875em;
text-align: center;
top: 2.3em;
}
.tasty-recipes-entry-content .tasty-recipes-notes p:last-child {
margin-bottom: 0;
}
.tasty-recipes-entry-content .tasty-recipes-keywords {
margin-top: 1em;
margin-bottom: 1em;
color: #aaaaaa;
}
.tasty-recipes-entry-content .tasty-recipes-keywords p {
margin-bottom: 0;
font-size: 0.7em;
}
.tasty-recipes-nutrifox {
text-align: center;
margin: 0;
}
.tasty-recipes-nutrifox iframe {
width: 100%;
display: block;
margin: 0;
}
.tasty-recipes-entry-content .tasty-recipes-nutrition ul li {
float: none;
line-height: 2em;
list-style-type: none;
margin-left: 0;
padding-left: 0.833em;
}
.tasty-recipes-entry-footer {
background-color: #fff;
padding-top: 1.5625em;
padding-bottom: 1.25em;
padding-left: 2.5em;
padding-right: 2.5em;
text-align: center;
}
.tasty-recipes-entry-footer .tasty-recipes-footer-content {
display: inline-block;
}
.tasty-recipes-entry-footer img {
width: 65px;
}
.tasty-recipes-entry-footer h3 {
font-size: 1.25em;
line-height: 2.25em;
margin-top: .5em;
margin-bottom: .125em;
padding: 0;
line-height: 1em;
}
.tasty-recipes-entry-footer p {
margin-bottom: 0;
font-size: .75em;
}
.tasty-recipes-entry-footer p a {
text-decoration: underline;
box-shadow: none;
border-bottom: none;
}
.tasty-recipes-entry-footer:after {
content: ” “;
display: block;
clear:both;
}
@media only screen and (max-width: 520px) {
.tasty-recipes-entry-footer h3 {
margin-top: .5em;
margin-bottom: .5em;
}
.tasty-recipes-entry-footer {
text-align: center;
}
}
@media only screen and (min-width: 520px) {
.tasty-recipes-entry-footer img {
float: left;
}
.tasty-recipes-entry-footer h3,
.tasty-recipes-entry-footer p {
margin-left: 90px;
clear: none;
text-align: left;
}
}
.clearfix:after {
clear: both;
content: ” “;
display: table;
}
/* Print view styles */
.tasty-recipes-print-view {
font-size: 11px;
}
.tasty-recipes-print-view .tasty-recipes-print-button {
display: inline-block;
}
.tasty-recipes-print {
padding:0;
}
.tasty-recipes-print-view .tasty-recipes,
.tasty-recipes-print-view .tasty-recipes-entry-content {
background: #fff;
}
.tasty-recipes-print-view .tasty-recipes {
margin-top: 1em;
}
.tasty-recipes-print .tasty-recipes-entry-header {
background-color: inherit;
color: inherit;
padding-bottom: 0;
padding-left: 1em;
padding-right: 1em;
}
.tasty-recipes-print .tasty-recipes-entry-header .tasty-recipes-image {
transform: none;
float: left;
margin-right: 16px;
}
.tasty-recipes-print-view .tasty-recipes-entry-header .tasty-recipes-header-content {
min-height: 150px;
}
.tasty-recipes-print.tasty-recipes-has-image .tasty-recipes-entry-header h2 {
margin-top: 0;
}
.tasty-recipes-print .tasty-recipes-entry-header h2 {
color: inherit;
margin-bottom: .5em;
}
.tasty-recipes-print .tasty-recipes-entry-header hr {
display: none;
}
.tasty-recipes-print .tasty-recipes-header-content .tasty-recipes-rating-outer {
position: initial;
text-align: left;
width: unset;
top: unset;
}
.tasty-recipes-print .tasty-recipes-entry-header .tasty-recipes-rating-stars span {
color: #000;
}
.tasty-recipes-print .tasty-recipes-entry-header .tasty-recipes-details ul {
padding: 0;
clear: none;
}
.tasty-recipes-print .tasty-recipes-entry-header .tasty-recipes-details ul li {
line-height: 1.8em;
margin-bottom: 0;
}
.tasty-recipes-print .tasty-recipes-entry-header .tasty-recipes-details .detail-icon {
display: none;
}
.tasty-recipes-print-view .tasty-recipes-source-link {
text-align: center;
}
.tasty-recipes-print-view .tasty-recipes-entry-content .tasty-recipes-ingredients ul li,
.tasty-recipes-print-view .tasty-recipes-entry-content .tasty-recipes-instructions ul li,
.tasty-recipes-print-view .tasty-recipes-entry-content .tasty-recipes-ingredients ol li,
.tasty-recipes-print-view .tasty-recipes-entry-content .tasty-recipes-instructions ol li {
margin-bottom: 0;
}
.tasty-recipes-print-view .tasty-recipes-entry-content .tasty-recipes-notes p,
.tasty-recipes-print-view .tasty-recipes-entry-content .tasty-recipes-notes ul li,
.tasty-recipes-print-view .tasty-recipes-entry-content .tasty-recipes-notes ol li {
margin-top: 1rem;
padding-top: 0;
padding-bottom: 0;
}
.tasty-recipes-print-view .tasty-recipes-entry-content .tasty-recipes-notes p:before,
.tasty-recipes-print-view .tasty-recipes-entry-content .tasty-recipes-notes ul li:before {
top: 0.1em;
}
Description
Rich and totally irresistible, this chocolate cake roll is for chocolate lovers everywhere. Follow this carefully explained step-by-step recipe and the video tutorial above for success.
Ingredients
- 4 large eggs, separated
- 1/3 cup (65g) granulated sugar
- 1/3 cup (65g) packed light or dark brown sugar
- 1 Tablespoon (15ml) strong brewed coffee *or* 1 teaspoon espresso powder
- 1/4 cup (60g) unsalted butter, melted
- 1 teaspoon pure vanilla extract
- 1/2 cup (62g) all-purpose flour
- 1/4 cup (42g) natural unsweetened cocoa powder, plus 2 Tablespoons (5g) for rolling*
- 1 teaspoon baking powder
- 1/4 teaspoon salt
Vanilla Whipped Cream
- 1 cup (120ml) heavy cream or heavy whipping cream
- 3 Tablespoons (38g) granulated sugar or confectioners’ sugar
- 1 teaspoon pure vanilla extract
- optional: 2 Tablespoons marshmallow creme (“Fluff”)
Chocolate Topping
- 1/2 cup (120ml) heavy cream or heavy whipping cream
- one 4 ounce bar (113g) semi-sweet chocolate, finely chopped
- optional for glossy shine: 1 teaspoon light corn syrup
Instructions
- Preheat oven to 350°F (177°C). Spray a 12×17 inch baking pan with nonstick spray or grease with butter, so the parchment paper sticks. Then line it with parchment paper so the cake seamlessly releases. Spray or grease the parchment paper too. We want an extremely nonstick surface for this cake roll!
- Make the cake: Using a hand mixer or a stand mixer fitted with whisk attachment, beat the egg whites and granulated sugar together in a medium bowl on high speed for 5 minutes or until stiff peaks form. Set aside. In another bowl, beat the egg yolks, brown sugar, and vanilla extract together until pale and creamy, about 2 minutes.
- Sift the flour, cocoa powder, baking powder, and salt together into a large bowl bowl. Pour the melted butter, coffee, and egg yolk mixture over the dry ingredients. Beat everything together on medium speed until completely combined. Using a rubber spatula or wooden spoon, gently fold in the egg whites until completely combined. Avoid over-mixing and deflating those whites! Batter will be very light.
- Spread batter evenly into prepared pan. It will be a very thin layer. Shimmy the pan on the counter to smooth out the top. Bake for 10 minutes or until the top of the cake gently springs back when touched with your finger. Do NOT over-bake!
- Roll the cake: As the cake bakes, place a piece of parchment paper (larger than the cake) or a thin kitchen towel flat on the counter. Sprinkle with a light coating of cocoa powder. Once the cake comes out of the oven, immediately invert it onto the parchment/towel. Peel off the parchment paper that was on the bottom of the cake as it baked. Starting with the narrow end, slowly and gently roll the cake up with the parchment/towel. The cake will be warm. Allow the cake to cool completely rolled up in the parchment/towel. Place in the refrigerator to speed it up, about 2-3 hours.
- Remove the cake roll from the refrigerator and allow to sit on the counter for a few minutes to warm up as you prepare the whipped cream.
- Make the whipped cream: Using a hand mixer or a stand mixer fitted with a whisk attachment, whip the heavy cream, sugar, and vanilla extract on medium-high speed until medium to stiff peaks form, about 2-3 minutes. Then beat in the marshmallow creme, if using.
- Slowly and gently unroll the cake. Spread whipped cream evenly on top, leaving about a 1/2 inch border around the cake. Gently roll the cake back up, without the parchment/towel this time. Place on a wire rack set on a baking sheet (to catch the extra ganache). Set aside on the counter or in the refrigerator as you prepare the ganache.
- Make the ganache topping: Place chopped chocolate and corn syrup, if using, in a medium bowl. Heat the cream in a small saucepan until it begins to gently simmer. (Do not let it come to a rapid boil– that’s too hot!) Pour over chocolate, then let it sit for 2-3 minutes to gently soften the chocolate. Slowly stir until completely combined and chocolate has melted.
- Pour ganache all over cake roll. Feel free to spoon up any dripped ganache and spoon over the cake again. Refrigerate for at least 30-60 minutes before slicing and serving.
- Cover leftover cake and store in the refrigerator for up to 3 days.
Notes
- Mini Chocolate Cake Rolls: Follow the recipe exactly as written. After spreading the whipped cream on top of the cake in step 8, cut the cake into 4 (approx 6 inch X 8.5 inch) rectangles as shown in the photo above. Starting with the narrow end, roll each mini roll up. Slice in half to make 8 mini cake rolls. Continue with the recipe. Top with sprinkles if desired.
- Brewed Coffee or Espresso Powder: A bit of coffee deepens chocolate flavor in desserts. This cake roll does not taste like coffee at all. You can use either liquid brewed coffee or espresso powder. I tested with both and was pleased with both.
- Sugar in Whipped Cream: Some bakers swear by granulated sugar in whipped cream; others swear by confectioners’ sugar. If you’re only working with a couple Tablespoons of sugar, it doesn’t really make a difference. Use either.
- Optional Marshmallow Creme: For a little marshmallow flavor, beat marshmallow creme into the whipped cream. This is totally optional. Taste testers didn’t really notice a difference!
Keywords: roll cake, whipped cream, ganache