It’s been a year in the making. I’m proud to finally share my version of caramel cake, a new cake recipe inspired by a favorite that my mother-in-law enjoyed when she was younger.
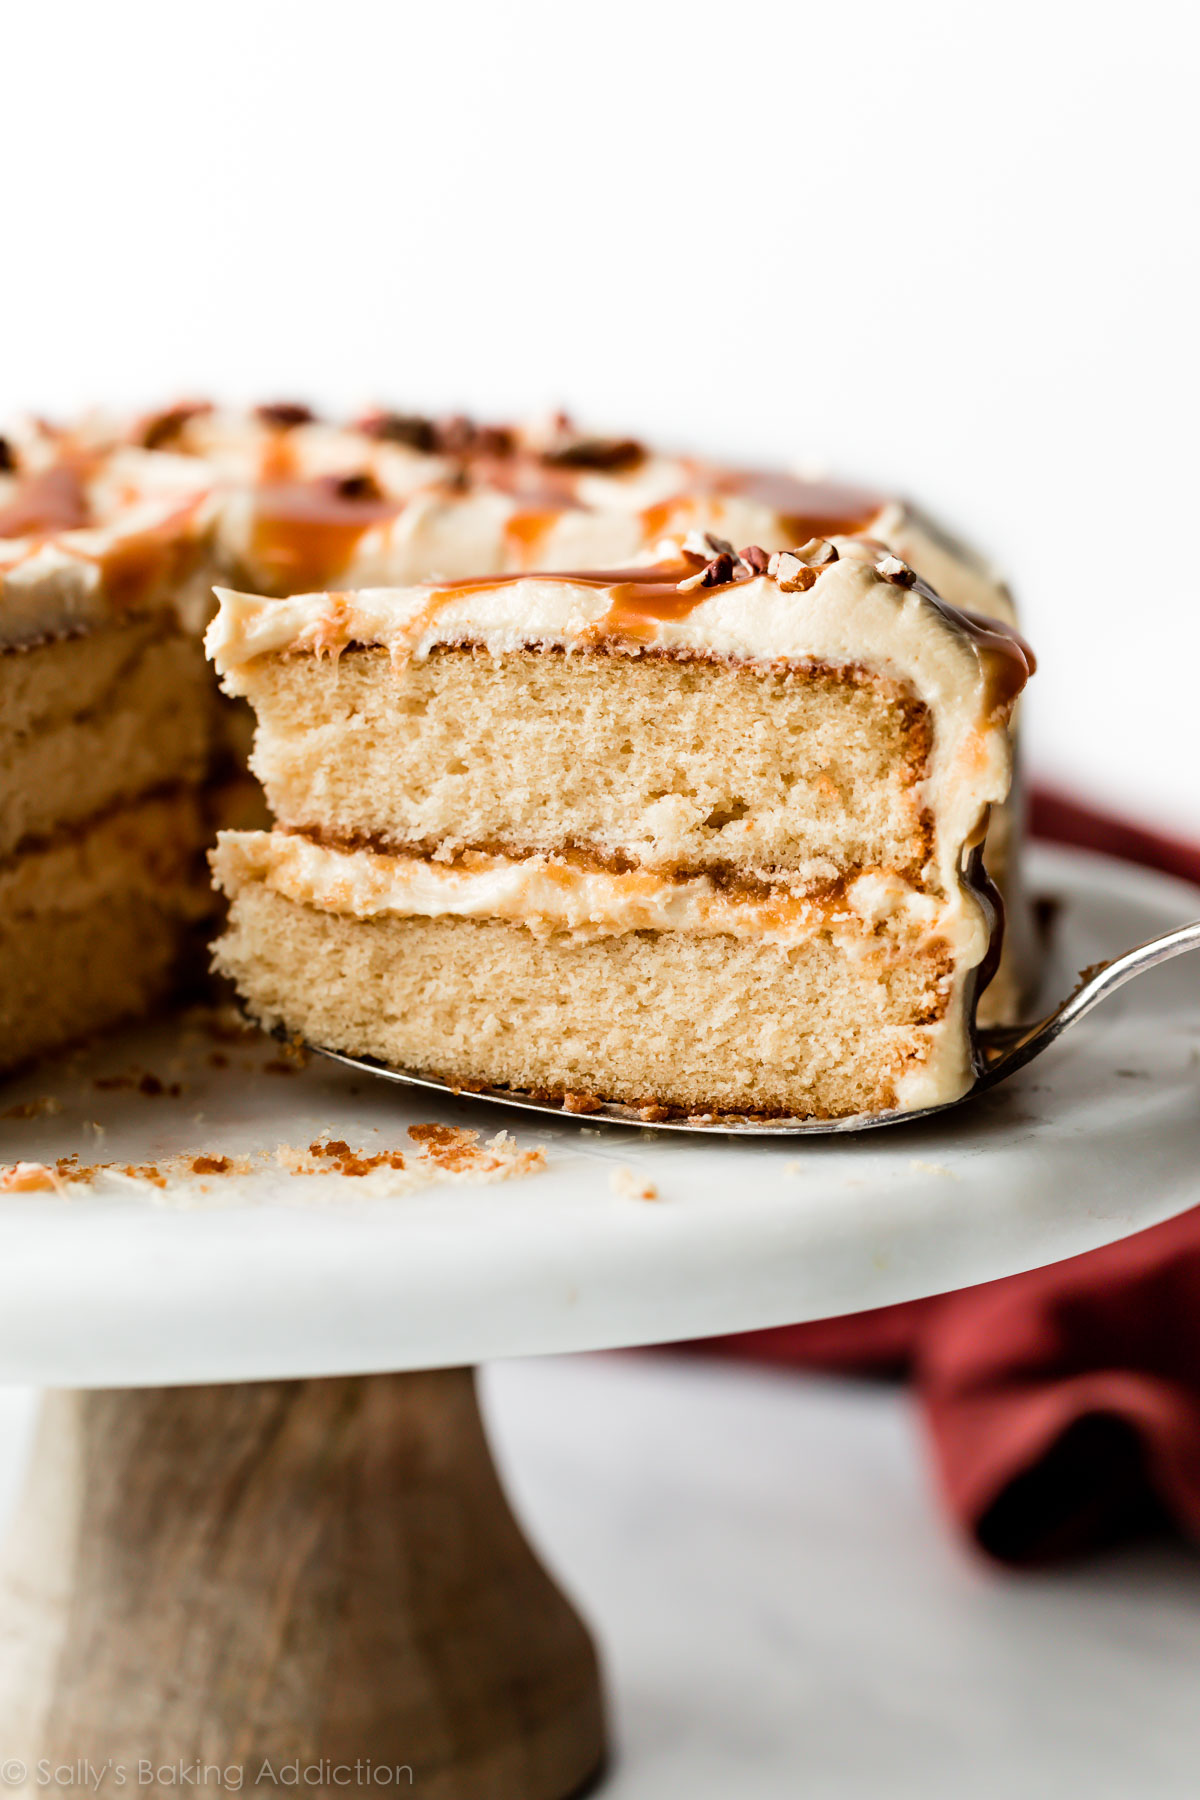
This burnt sugar caramel cake is a wonderfully sweet and buttery cake flavored with homemade burnt sugar syrup. The syrup combines caramelized sugar and water, a mixture you cook on the stove until it’s dark amber in color. We’ll flavor the frosting with burnt sugar syrup as well. Inside the cake and frosting, the syrup tastes like caramel. In my experience, this is the only from-scratch caramel flavored addition that (1) provides flavor and (2) doesn’t ruin the cake’s texture.
This is not the exact recipe that my mother-in-law used to enjoy. Sadly, she was unable to find her original. She tried a few online recipes for burnt sugar cake, but none of them lived up to her memories. I researched a few recipes and after testing them myself, I was pretty disappointed at the dense texture and lack of flavor. I tried adding brown sugar and more vanilla for extra flavor, but nothing proved successful. So I turned to my white cake recipe, a cake that’s consistently soft and flavorful. My white cake is the starting point for strawberry cake, pistachio cake, and coconut cake because it’s ALWAYS a winner.
My MIL said it’s the only burnt sugar cake most resembling what she enjoyed growing up!
The most important step in this cake recipe is preparing the burnt sugar syrup. You need a sturdy 3 quart pan to ensure the cooking sugar doesn’t crystalize. (This pan is great quality for its price.) Cook 1 cup granulated sugar over medium heat, stirring constantly with a wooden spoon. Wooden spoons do not conduct heat and are ideal for candy-making. After chipping a few of my old wooden spoons, I just bought this set and LOVE them!
After about 5 minutes, the sugar begins to melt. If you notice any clumps, try to break them up with your spoon. So far in the process, this is the same exact way we start salted caramel. Once there are no lumps and the sugar is golden brown, about 8-10 minutes total, very slowly drizzle in 3/4 cup of boiling water. Have boiling water at the ready for this step because in the world of candy-making, timing and temperature are key. Wear an oven mitt because the water will rapidly sizzle and steam.
After you add all of the water, cook the syrup for an extra 3 minutes over low heat then cool the syrup completely. It will thicken as it cools. Once cool, you can use it in the cake batter and frosting. The cake batter is light beige and smells incredible. Steal a taste!
Same goes for the burnt sugar frosting– make sure you steal a few tastes! You need:
.tasty-recipes-image {
float: right; }
.tasty-recipes-yield-scale {
border: 1px solid #979599;
border-radius: 2px;
color: #979599;
margin-left: 3px;
padding: 0 4px;
font-size: 0.7rem; }
.tasty-recipes-scale-container {
float: right;
padding: 0 0 1rem; }
.tasty-recipes-scale-container .tasty-recipes-scale-label {
text-transform: uppercase;
font-size: 0.6rem;
color: #979599; }
.tasty-recipes-scale-container button {
background: transparent;
border: 1px solid #979599;
border-radius: 2px;
color: #979599;
margin-left: 5px;
padding: 2px 4px; }
.tasty-recipes-scale-container button.tasty-recipes-scale-button-active {
color: #353547;
border-color: #353547; }
.tasty-recipes-scale-container button:focus {
outline: none; }
.tasty-recipes-print-button {
background-color: #666677;
display: inline-block;
padding-left: 1em;
padding-right: 1em;
padding-top: 0.5em;
padding-bottom: 0.5em;
text-decoration: none; }
a.tasty-recipes-print-button {
color: #fff; }
a.tasty-recipes-print-button:hover {
color: #fff; }
.tasty-recipes-equipment {
display: -webkit-box;
display: flex;
flex-wrap: wrap;
-webkit-box-pack: space-evenly;
justify-content: space-evenly; }
.tasty-recipes-equipment > h3 {
-webkit-box-flex: 0;
flex: 0 0 100%; }
.tasty-recipes-equipment .tasty-link-card {
-webkit-box-flex: 0;
flex: 0 0 50%;
padding: 1.5rem 1rem;
text-align: center; }
@media screen and (min-width: 500px) {
.tasty-recipes-equipment .tasty-link-card {
-webkit-box-flex: 0;
flex: 0 0 33%; } }
.tasty-recipes-equipment .tasty-link-card p {
font-weight: bold;
font-size: 1em;
margin-bottom: 0; }
.tasty-recipes-equipment .tasty-link-card p a {
color: initial; }
.tasty-recipes-equipment .tasty-link-card span {
font-size: 0.9em; }
.tasty-recipes-rating.tasty-recipes-clip-10 {
-webkit-clip-path: polygon(0 0, 10% 0%, 10% 100%, 0% 100%);
clip-path: polygon(0 0, 10% 0%, 10% 100%, 0% 100%); }
.tasty-recipes-rating.tasty-recipes-clip-20 {
-webkit-clip-path: polygon(0 0, 20% 0%, 20% 100%, 0% 100%);
clip-path: polygon(0 0, 20% 0%, 20% 100%, 0% 100%); }
.tasty-recipes-rating.tasty-recipes-clip-30 {
-webkit-clip-path: polygon(0 0, 30% 0%, 30% 100%, 0% 100%);
clip-path: polygon(0 0, 30% 0%, 30% 100%, 0% 100%); }
.tasty-recipes-rating.tasty-recipes-clip-40 {
-webkit-clip-path: polygon(0 0, 40% 0%, 40% 100%, 0% 100%);
clip-path: polygon(0 0, 40% 0%, 40% 100%, 0% 100%); }
.tasty-recipes-rating.tasty-recipes-clip-50 {
-webkit-clip-path: polygon(0 0, 50% 0%, 50% 100%, 0% 100%);
clip-path: polygon(0 0, 50% 0%, 50% 100%, 0% 100%); }
.tasty-recipes-rating.tasty-recipes-clip-60 {
-webkit-clip-path: polygon(0 0, 60% 0%, 60% 100%, 0% 100%);
clip-path: polygon(0 0, 60% 0%, 60% 100%, 0% 100%); }
.tasty-recipes-rating.tasty-recipes-clip-70 {
-webkit-clip-path: polygon(0 0, 70% 0%, 70% 100%, 0% 100%);
clip-path: polygon(0 0, 70% 0%, 70% 100%, 0% 100%); }
.tasty-recipes-rating.tasty-recipes-clip-80 {
-webkit-clip-path: polygon(0 0, 80% 0%, 80% 100%, 0% 100%);
clip-path: polygon(0 0, 80% 0%, 80% 100%, 0% 100%); }
.tasty-recipes-rating.tasty-recipes-clip-90 {
-webkit-clip-path: polygon(0 0, 90% 0%, 90% 100%, 0% 100%);
clip-path: polygon(0 0, 90% 0%, 90% 100%, 0% 100%); }
.tasty-recipes-nutrition ul {
list-style-type: none;
margin: 0;
padding: 0; }
.tasty-recipes-nutrition ul:after {
display: block;
content: ‘ ‘;
clear: both; }
.tasty-recipes-nutrition li {
float: left;
margin-right: 1em; }
.tasty-recipes-plug {
text-align: center;
margin-bottom: 1em;
display: -webkit-box;
display: flex;
-webkit-box-align: center;
align-items: center;
-webkit-box-pack: center;
justify-content: center; }
.tasty-recipes-plug a {
text-decoration: none;
box-shadow: none; }
.tasty-recipes-plug a img {
width: 150px;
height: auto;
margin: 5px 0 0 8px;
display: inline-block; }
@media print {
.tasty-recipes-no-print,
.tasty-recipes-no-print * {
display: none !important; } }
.tasty-recipes {
margin-bottom: 4em;
max-width: 700px;
background-color: #f9f9f9;
}
.tasty-recipes.tasty-recipes-has-plug {
margin-bottom: 1em;
}
.tasty-recipes-plug {
margin-bottom: 4em;
}
.tasty-recipes-print-button {
display: none;
}
.tasty-recipes-image-shim {
height: 69.5px;
clear: both;
}
.tasty-recipes-entry-header {
background-color: #f9f9f9;
padding-top: 2em;
padding-left: 2em;
padding-right: 2em;
}
.tasty-recipes-entry-header.tasty-recipes-has-image {
padding-top: 0px;
}
.tasty-recipes-entry-header .tasty-recipes-image {
float: none;
margin-bottom: 1em;
}
@media only screen and (min-width: 730px) {
.tasty-recipes-entry-header .tasty-recipes-image {
float: left;
margin-right: 16px;
}
}
.tasty-recipes-entry-header .tasty-recipes-image img {
float: none;
height: 150px;
width: 150px;
}
.tasty-recipes-entry-header .tasty-recipes-header-content {
min-height: 215px;
}
.tasty-recipes-entry-header h2 {
margin-bottom: 0;
margin-top: 0;
padding-top: 0;
padding-bottom: 0;
clear: none;
}
.tasty-recipes-entry-header hr {
border: 1px solid #eee;
background-color: #eee;
margin-bottom: 0;
margin-top: 1em;
margin-right: -2em;
margin-left: -2em;
}
.tasty-recipes-entry-header .tasty-recipes-rating-outer {
width: 100%;
}
.tasty-recipes-entry-header .tasty-recipes-rating-outer a {
text-decoration: none;
border: none;
display: inherit;
box-shadow: none;
}
.tasty-recipes-entry-header .tasty-recipes-rating-outer a:hover {
text-decoration: none;
}
.tasty-recipes-entry-header .tasty-recipes-rating-stars {
font-size: 18px;
}
.tasty-recipes-entry-header .tasty-recipes-rating-stars span {
margin-right: 2px;
margin-left: 2px;
color: #aaaaaa;
}
.tasty-recipes-entry-header .tasty-recipes-rating-stars span:first-child {
margin-left: 0;
}
.tasty-recipes-entry-header .tasty-recipes-rating-label {
color: #B7BBC6;
font-size: .6875em;
margin-top: 1em;
position: absolute;
}
.tasty-recipes-entry-header .tasty-recipes-rating-stars .post-ratings {
font-size: 10px;
}
.tasty-recipes-entry-header .tasty-recipes-rating-stars .post-ratings .tasty-recipes-cf-ratings-label {
margin-top: 0;
line-height: 1;
}
.tasty-recipes-entry-header .tasty-recipes-details {
margin-top: 1.5em;
color: #606060;
}
.tasty-recipes-entry-header .tasty-recipes-details ul {
list-style-type: none;
margin: 0;
padding-left: 0;
}
.tasty-recipes-entry-header .tasty-recipes-details ul li {
display: inline-block;
margin-left: 0;
padding-left: 0;
margin-right: .5em;
margin-bottom: 0;
font-size: 1em;
line-height: 1.8em;
}
.tasty-recipes-entry-header .tasty-recipes-details .detail-icon {
height: 1em;
margin-top: .4em;
}
.tasty-recipes-entry-header .tasty-recipes-details ul li {
font-size: 1em;
}
.tasty-recipes-entry-header .tasty-recipes-details .tasty-recipes-label {
margin-right: .125em;
}
.tasty-recipes-entry-header .tasty-recipes-details .detail-icon {
vertical-align: top;
margin-right: .2em;
}
@media only screen and (min-width: 730px) {
.tasty-recipes-entry-header .tasty-recipes-details {
padding-left: 166px;
}
}
.tasty-recipes-entry-content {
padding-top: 0.1em;
background: #f9f9f9;
color: #606060;
clear: both;
}
.tasty-recipes-entry-header .tasty-recipes-buttons {
margin-top: 1.25em;
margin-bottom: 1.25em;
width: 100%;
}
.tasty-recipes-entry-header .tasty-recipes-buttons:after {
content: ” “;
display: block;
clear: both;
}
.tasty-recipes-entry-header .tasty-recipes-button-wrap {
box-sizing: border-box;
}
.tasty-recipes-entry-header .tasty-recipes-buttons a {
text-transform: uppercase;
text-align: center;
display: block;
background-color: #f9f9f9;
font-size: 1em;
line-height: 1.375em;
font-weight: bold;
padding-top: 7px;
padding-bottom: 7px;
margin-top: 0;
border: 1px solid #aaaaaa;;
border-radius: 0;
text-decoration: none;
color: #aaaaaa;
}
.tasty-recipes-entry-header .tasty-recipes-buttons .button:hover {
background-color: #f9f9f9;
border: 3px solid #aaaaaa;
color: #aaaaaa;
opacity: 1;
}
.tasty-recipes-entry-content a img {
box-shadow: none;
-webkit-box-shadow: none;
}
.tasty-recipes-entry-header .tasty-recipes-buttons a:hover {
background-color: #979599;
text-decoration: none;
}
.tasty-recipes-entry-header .tasty-recipes-buttons img {
vertical-align: top;
}
.tasty-recipes-entry-header .tasty-recipes-buttons img.svg-print,
.tasty-recipes-entry-header .tasty-recipes-buttons img.svg-pinterest {
height: 1.25em;
margin-right: .375em;
margin-bottom: 0;
background: none;
display: inline-block;
box-shadow: none;
}
@media only screen and (max-width: 730px) {
.tasty-recipes-entry-header .tasty-recipes-button-wrap {
width: 100%;
}
.tasty-recipes-entry-header .tasty-recipes-button-wrap:nth-child(2) {
padding-top: 1em;
}
}
@media only screen and (min-width: 450px) {
.tasty-recipes-entry-header .tasty-recipes-buttons {
width: 100%;
float: none;
}
.tasty-recipes-entry-header .tasty-recipes-button-wrap:first-child {
width: 50%;
padding-right: 5px;
float: left;
}
.tasty-recipes-entry-header .tasty-recipes-button-wrap:last-child {
width: 50%;
padding-left: 5px;
float: right;
padding-top: 0;
}
}
@media only screen and (min-width: 730px) {
.tasty-recipes-entry-header .tasty-recipes-buttons {
padding-left: 166px;
box-sizing: border-box;
}
.tasty-recipes-header-content {
position: relative;
}
.tasty-recipes-header-content .tasty-recipes-rating-outer {
position: absolute;
top: 155px;
width: 150px;
text-align: center;
}
.tasty-recipes-header-content .tasty-recipes-rating-label {
display: block;
position: static;
margin-top: 0;
}
}
.tasty-recipes-entry-content h3 {
color: initial;
}
.tasty-recipes-entry-content h4 {
font-size: 1em;
padding-top: 0;
margin-bottom: 1.5em;
margin-top: 1.5em;
}
.tasty-recipes-entry-content hr {
background-color: #eee;
border: 1px solid #eee;
margin-top: 1em;
margin-bottom: 1em;
}
.tasty-recipes-entry-content .tasty-recipes-description,
.tasty-recipes-entry-content .tasty-recipes-ingredients,
.tasty-recipes-entry-content .tasty-recipes-instructions,
.tasty-recipes-entry-content .tasty-recipes-keywords {
padding-left: 2em;
padding-right: 2em;
}
.tasty-recipes-entry-content .tasty-recipes-description p {
margin-bottom: 1em;
}
.tasty-recipes-entry-content .tasty-recipes-ingredients ul,
.tasty-recipes-entry-content .tasty-recipes-instructions ul {
list-style-type: none;
margin-left: 0;
margin-bottom: 1.5em;
padding: 0;
}
.tasty-recipes-entry-content .tasty-recipes-ingredients ul li,
.tasty-recipes-entry-content .tasty-recipes-instructions ul li {
margin-bottom: .625em;
list-style-type: none;
position: relative;
margin-left: 2.5em;
line-height: 1.46;
}
.tasty-recipes-entry-content .tasty-recipes-ingredients ul li:before,
.tasty-recipes-entry-content .tasty-recipes-instructions ul li:before {
background-color: #aaaaaa;
-webkit-border-radius: 50%;
-moz-border-radius: 50%;
border-radius: 50%;
height: .5em;
width: .5em;
display: block;
content: ” “;
left: -1.25em;
top: .375em;
position: absolute;
}
.tasty-recipes-entry-content .tasty-recipes-ingredients ol,
.tasty-recipes-entry-content .tasty-recipes-instructions ol {
counter-reset:li;
margin-left: 0;
padding: 0;
}
.tasty-recipes-entry-content .tasty-recipes-ingredients ol li,
.tasty-recipes-entry-content .tasty-recipes-instructions ol li {
list-style-type: none;
position: relative;
margin-bottom: 1em;
margin-left: 2.5em;
line-height: 1.46;
}
.tasty-recipes-entry-content .tasty-recipes-ingredients ol li:before,
.tasty-recipes-entry-content .tasty-recipes-instructions ol li:before {
content:counter(li);
counter-increment: li;
position: absolute;
background-color: #aaaaaa;
-webkit-border-radius: 50%;
-moz-border-radius: 50%;
border-radius: 50%;
height: 1.45em;
width: 1.45em;
color: #FFF;
left: -1.25em;
transform: translateX(-50%);
line-height: 1.5em;
font-size: .6875em;
text-align: center;
top: .1875em;
}
@media only screen and (max-width: 520px) {
.tasty-recipes-entry-content .tasty-recipes-ingredients ol,
.tasty-recipes-entry-content .tasty-recipes-instructions ol {
margin-left: 0;
}
}
.tasty-recipes-entry-content .tasty-recipes-equipment {
padding-left: 2em;
padding-right: 2em;
}
.tasty-recipes-entry-content .tasty-recipe-video-embed ~ .tasty-recipes-equipment {
padding-top: 1em;
}
.tasty-recipes-entry-content .tasty-recipes-notes,
.tasty-recipes-entry-content .tasty-recipes-nutrition {
padding-bottom: 1.25em;
padding-left: 2em;
padding-right: 2em;
}
.tasty-recipes-entry-content .tasty-recipes-notes ol {
counter-reset:li;
margin-left: 0;
padding: 0;
margin-bottom: 0;
}
.tasty-recipes-entry-content .tasty-recipes-notes ul {
margin-left: 0;
padding: 0;
margin-bottom: 0;
}
.tasty-recipes-entry-content .tasty-recipes-notes p,
.tasty-recipes-entry-content .tasty-recipes-notes ul li,
.tasty-recipes-entry-content .tasty-recipes-notes ol li {
padding-left: 1.5625em;
padding-right: 1.5625em;
padding-top: 1.25em;
padding-bottom: 1.25em;
position: relative;
margin-bottom: 1.5em;
list-style-type: none;
}
.tasty-recipes-entry-content .tasty-recipes-notes p,
.tasty-recipes-entry-content .tasty-recipes-notes ul li,
.tasty-recipes-entry-content .tasty-recipes-notes ol li {
padding-left: 2.5em;
margin-left: 0;
margin-bottom: 0;
}
.tasty-recipes-entry-content .tasty-recipes-notes p:before,
.tasty-recipes-entry-content .tasty-recipes-notes ul li:before {
content: “i”;
display: block;
background-color: #aaaaaa;
-webkit-border-radius: 50%;
-moz-border-radius: 50%;
border-radius: 50%;
height: 1.3em;
width: 1.3em;
font-size: .75em;
line-height: 1.3em;
text-align: center;
color: #FFF;
position: absolute;
left: 1.167em;
top: 2.1em;
}
.tasty-recipes-entry-content .tasty-recipes-notes ol li:before {
content:counter(li);
counter-increment: li;
position: absolute;
background-color: #aaaaaa;
-webkit-border-radius: 50%;
-moz-border-radius: 50%;
border-radius: 50%;
height: 1.45em;
width: 1.45em;
color: #FFF;
left: 2em;
transform: translateX(-50%);
line-height: 1.5em;
font-size: .6875em;
text-align: center;
top: 2.3em;
}
.tasty-recipes-entry-content .tasty-recipes-notes p:last-child {
margin-bottom: 0;
}
.tasty-recipes-entry-content .tasty-recipes-keywords {
margin-top: 1em;
margin-bottom: 1em;
color: #aaaaaa;
}
.tasty-recipes-entry-content .tasty-recipes-keywords p {
margin-bottom: 0;
font-size: 0.7em;
}
.tasty-recipes-nutrifox {
text-align: center;
margin: 0;
}
.tasty-recipes-nutrifox iframe {
width: 100%;
display: block;
margin: 0;
}
.tasty-recipes-entry-content .tasty-recipes-nutrition ul li {
float: none;
line-height: 2em;
list-style-type: none;
margin-left: 0;
padding-left: 0.833em;
}
.tasty-recipes-entry-footer {
background-color: #fff;
padding-top: 1.5625em;
padding-bottom: 1.25em;
padding-left: 2.5em;
padding-right: 2.5em;
text-align: center;
}
.tasty-recipes-entry-footer .tasty-recipes-footer-content {
display: inline-block;
}
.tasty-recipes-entry-footer img {
width: 65px;
}
.tasty-recipes-entry-footer h3 {
font-size: 1.25em;
line-height: 2.25em;
margin-top: .5em;
margin-bottom: .125em;
padding: 0;
line-height: 1em;
}
.tasty-recipes-entry-footer p {
margin-bottom: 0;
font-size: .75em;
}
.tasty-recipes-entry-footer p a {
text-decoration: underline;
box-shadow: none;
border-bottom: none;
}
.tasty-recipes-entry-footer:after {
content: ” “;
display: block;
clear:both;
}
@media only screen and (max-width: 520px) {
.tasty-recipes-entry-footer h3 {
margin-top: .5em;
margin-bottom: .5em;
}
.tasty-recipes-entry-footer {
text-align: center;
}
}
@media only screen and (min-width: 520px) {
.tasty-recipes-entry-footer img {
float: left;
}
.tasty-recipes-entry-footer h3,
.tasty-recipes-entry-footer p {
margin-left: 90px;
clear: none;
text-align: left;
}
}
.clearfix:after {
clear: both;
content: ” “;
display: table;
}
/* Print view styles */
.tasty-recipes-print-view {
font-size: 11px;
}
.tasty-recipes-print-view .tasty-recipes-print-button {
display: inline-block;
}
.tasty-recipes-print {
padding:0;
}
.tasty-recipes-print-view .tasty-recipes,
.tasty-recipes-print-view .tasty-recipes-entry-content {
background: #fff;
}
.tasty-recipes-print-view .tasty-recipes {
margin-top: 1em;
}
.tasty-recipes-print .tasty-recipes-entry-header {
background-color: inherit;
color: inherit;
padding-bottom: 0;
padding-left: 1em;
padding-right: 1em;
}
.tasty-recipes-print .tasty-recipes-entry-header .tasty-recipes-image {
transform: none;
float: left;
margin-right: 16px;
}
.tasty-recipes-print-view .tasty-recipes-entry-header .tasty-recipes-header-content {
min-height: 150px;
}
.tasty-recipes-print.tasty-recipes-has-image .tasty-recipes-entry-header h2 {
margin-top: 0;
}
.tasty-recipes-print .tasty-recipes-entry-header h2 {
color: inherit;
margin-bottom: .5em;
}
.tasty-recipes-print .tasty-recipes-entry-header hr {
display: none;
}
.tasty-recipes-print .tasty-recipes-header-content .tasty-recipes-rating-outer {
position: initial;
text-align: left;
width: unset;
top: unset;
}
.tasty-recipes-print .tasty-recipes-entry-header .tasty-recipes-rating-stars span {
color: #000;
}
.tasty-recipes-print .tasty-recipes-entry-header .tasty-recipes-details ul {
padding: 0;
clear: none;
}
.tasty-recipes-print .tasty-recipes-entry-header .tasty-recipes-details ul li {
line-height: 1.8em;
margin-bottom: 0;
}
.tasty-recipes-print .tasty-recipes-entry-header .tasty-recipes-details .detail-icon {
display: none;
}
.tasty-recipes-print-view .tasty-recipes-source-link {
text-align: center;
}
.tasty-recipes-print-view .tasty-recipes-entry-content .tasty-recipes-ingredients ul li,
.tasty-recipes-print-view .tasty-recipes-entry-content .tasty-recipes-instructions ul li,
.tasty-recipes-print-view .tasty-recipes-entry-content .tasty-recipes-ingredients ol li,
.tasty-recipes-print-view .tasty-recipes-entry-content .tasty-recipes-instructions ol li {
margin-bottom: 0;
}
.tasty-recipes-print-view .tasty-recipes-entry-content .tasty-recipes-notes p,
.tasty-recipes-print-view .tasty-recipes-entry-content .tasty-recipes-notes ul li,
.tasty-recipes-print-view .tasty-recipes-entry-content .tasty-recipes-notes ol li {
margin-top: 1rem;
padding-top: 0;
padding-bottom: 0;
}
.tasty-recipes-print-view .tasty-recipes-entry-content .tasty-recipes-notes p:before,
.tasty-recipes-print-view .tasty-recipes-entry-content .tasty-recipes-notes ul li:before {
top: 0.1em;
}
Description
The trick to burnt sugar cake is to use burnt sugar syrup as its main flavor. Make sure you prepare the burnt sugar syrup ahead of time so that it can properly cool and thicken. While you’re at it, prepare the salted caramel ahead of time too.
Ingredients
Burnt Sugar Syrup
- 1 cup (200g) granulated sugar
- 3/4 cup (180ml) boiling water
Cake
- 2 and 1/2 cups (250g) sifted cake flour* (spoon & leveled)
- 2 teaspoons baking powder
- 1/2 teaspoon baking soda
- 1 teaspoon salt
- 3/4 cup (1.5 sticks; 170g) unsalted butter, softened to room temperature
- 1 cup (200g) granulated sugar
- 1/2 cup (120ml) cooled burnt sugar syrup
- 4 egg whites, at room temperature
- 1/2 cup (120g) sour cream, at room temperature
- 2 teaspoons pure vanilla extract
- 1/2 cup (120ml) whole milk, at room temperature
Burnt Sugar Frosting
- 1 cup (2 sticks; 230g) unsalted butter, softened to room temperature
- 4 cups (480g) confectioners’ sugar
- 1/2 cup (120ml) cooled burnt sugar syrup
- 1 teaspoon pure vanilla extract
- 2 Tablespoons (30ml) whole milk or heavy cream
- 1/4 teaspoon salt
For Assembly
Instructions
- For best success, read the recipe in full and watch the video tutorial in the post above before starting.
- Prepare the burnt sugar syrup first so it has time to cool. Make sure you have boiling water at the ready. For the burnt sugar syrup, place sugar in a medium saucepan over medium heat. Best to use a 3 quart heavy-bottomed quality saucepan. Stirring constantly with a wooden spoon, cook until the sugar has completely melted and is amber brown, about 8-10 minutes. If the sugar is clumpy, break up the lumps with your wooden spoon. A candy thermometer is not necessary, but if you’re using one, the sugar temperature should reach about 300°F (149°C) when it’s ready. Turn the heat to low and very carefully and slowly drizzle in the boiling water, a little at a time. Stir after each addition and stand back, as the mixture will rapidly sizzle and bubble. After all of the boiling water is stirred in, stir and cook the sugar syrup for 3 more minutes on low. Turn off the heat and let it cool completely, overnight preferred. It’s imperative that the sugar syrup is completely cool. You will have about 1 cup of syrup.
- Preheat oven to 350°F (177°C). Grease two 9-inch cake pans, line with parchment paper, then grease the parchment paper. Parchment paper helps the cakes seamlessly release from the pans.
- Whisk the cake flour, baking powder, baking soda, and salt together. Set aside.
- Using a handheld or stand mixer fitted with a whisk attachment, beat the butter and sugar together on high speed until creamed, about 2 minutes. Scrape down the sides and up the bottom of the bowl with a rubber spatula as needed. With the mixer running on medium speed, pour in 1/2 cup of the cooled burnt sugar syrup. Beat until combined. Scrape down the sides and up the bottom of the bowl as needed. Beat in the egg whites, sour cream, and vanilla extract. With the mixer on low speed, add the dry ingredients just until combined. With the mixer still running on low, slowly pour in the milk until combined. Do not over-mix. The batter will be slightly thick.
- Pour batter evenly into prepared cake pans. Bake for 23-25 minutes or until the cakes are baked through. As a result of the burnt sugar syrup cooking inside the cake batter, the cakes brown nicely on top and on the sides. To test for doneness, insert a toothpick into the center of the cake. If it comes out clean, it is done. Allow cakes to cool completely in the pans set on a wire rack.
- As the cakes cool, I suggest making the salted caramel. The salted caramel adds necessary flavor. We’ll use it as a filling and garnish. When ready to use in step 9, make sure the salted caramel isn’t too hot anymore. If it’s too hot, it will melt the frosting. If it’s too cool, it won’t drizzle. Let it cool for at least 30 minutes before using. If you prepared the salted caramel ahead of time and it became too cool or too thick, microwave it for 5-10 seconds or JUST until it’s drizzle-able again. (It won’t be too hot at this point.) You can also toast the pecans during this time, too. See recipe note.
- Make the frosting: In a large bowl using a hand-held mixer or stand mixer fitted with a paddle attachment, beat the butter on medium speed until creamy, about 1-2 minutes. Add confectioners’ sugar, remaining 1/2 cup of cooled burnt sugar syrup, vanilla extract, milk/cream, and salt. Beat on low speed for 30 seconds, then increase to high speed and beat until completely combined, about 2 minutes. Add more confectioners’ sugar if frosting is too thin or more milk/cream if frosting is too thick. Taste. Add more salt if desired. (I usually use 1/2 teaspoon of salt total. I like this frosting salty/sweet.)
- Assemble and frost: First, using a large serrated knife or cake leveler, slice a thin layer off the tops of the cakes to create a flat surface. Discard (or crumble over ice cream!). If you have any leftover burnt sugar syrup, drizzle over leveled cakes. I usually don’t have any leftover, but this is a great place to use any last drops if you have some. Place 1 cake layer on your cake stand or serving plate. Using a large icing spatula, evenly cover the top with frosting. Drizzle 1/4 cup of salted caramel on top of the frosting. Top with 2nd cake layer. Refrigerate the cake for at least 30-45 minutes before finishing the frosting and garnish. The caramel inside the cake must “set.” After chilling in the refrigerator, spread the remaining frosting all over the top and sides. Run a bench scraper around the cake to smooth out the sides, if desired. Garnish with toasted pecans and more salted caramel. Slice and serve.
- Cover leftover cake tightly and store in the refrigerator for up to 5 days.
Notes
- Make Ahead & Freezing Instructions: Prepare burnt sugar syrup up to 3 days ahead of time. Cover and store at room temperature until ready to use. Prepare the salted caramel up to 1 week ahead of time. Cover and store in the refrigerator until ready to use. You can prepare the cake layers ahead of time too. Wrap the individual baked and cooled cake layers tightly and refrigerate for up to 2 days or freeze up to 3 months. (See How to Freeze Cake for instructions.) Bring cake layers to room temperature, then continue with step 7. Frosted cake freezes well, up to 3 months. Thaw overnight in the refrigerator, then bring to room temperature before garnishing with caramel and pecans and serving.
- Special Tools: KitchenAid Stand Mixer, Wooden Spoons, Stainless Steel Saucepan, 9-inch Cake Pans, Straight Frosting Spatula, Bench Scraper, and Wood & Marble Cake Stand
- 3 Layer Cake or 9×13 Inch Cake: You can also prepare this cake as a 3 layer cake or 9×13 inch sheet cake, but the texture tastes best at the thickness of a 2 layer cake. I highly recommend sticking to a 2 layer cake. For a 3 layer cake, though, divide batter between three 8-inch or 9-inch cake pans and bake for 20-22 minutes or until a toothpick inserted in the center comes out clean. For a 9×13 inch cake, pour the batter into a greased and lightly floured 9×13 inch pan and bake for 40 minutes or until a toothpick inserted in the center comes out clean.
- Cupcakes: Recipe yields 30-36 cupcakes. Fill cupcake liners 2/3 full with batter. Bake for 20-22 minutes or until a toothpick inserted in the center comes out clean.
- Cake Flour: If you can’t get your hands on cake flour, use this cake flour substitute. I suggest doing this 3x, then remove 1/2 cup since you need 2 and 1/2 cups in this recipe.
- Egg Whites: Egg whites (no yolks) are KEY to the cake’s fluffy texture. Here are recipes using leftover egg yolks.
- Why Room Temperature? All refrigerated items should be at room temperature so the batter mixes together easily and evenly. Read here for more information. Instead of sour cream, you can use plain yogurt. The cake won’t taste as rich, but it’s a fine substitute.
- Toasted Pecans: Toasting the pecans is optional, but adds incredible flavor to the garnish. To toast, preheat the oven to 300°F (149°C). Spread chopped pecans onto a parchment paper or silicone baking mat lined baking sheet. Toast until slightly darkened, about 5-7 minutes. Cool before using as garnish.
Keywords: caramel, burnt sugar, fall dessert